Find out more about all options available for the checkout, taxes and fees by reading this article
Last update [Mar 8, 2022]
In this article, we will go through the following 3 available tabs menus in the Checkout Taxes and Fees dashboard (click to navigate directly to that option):
Overview
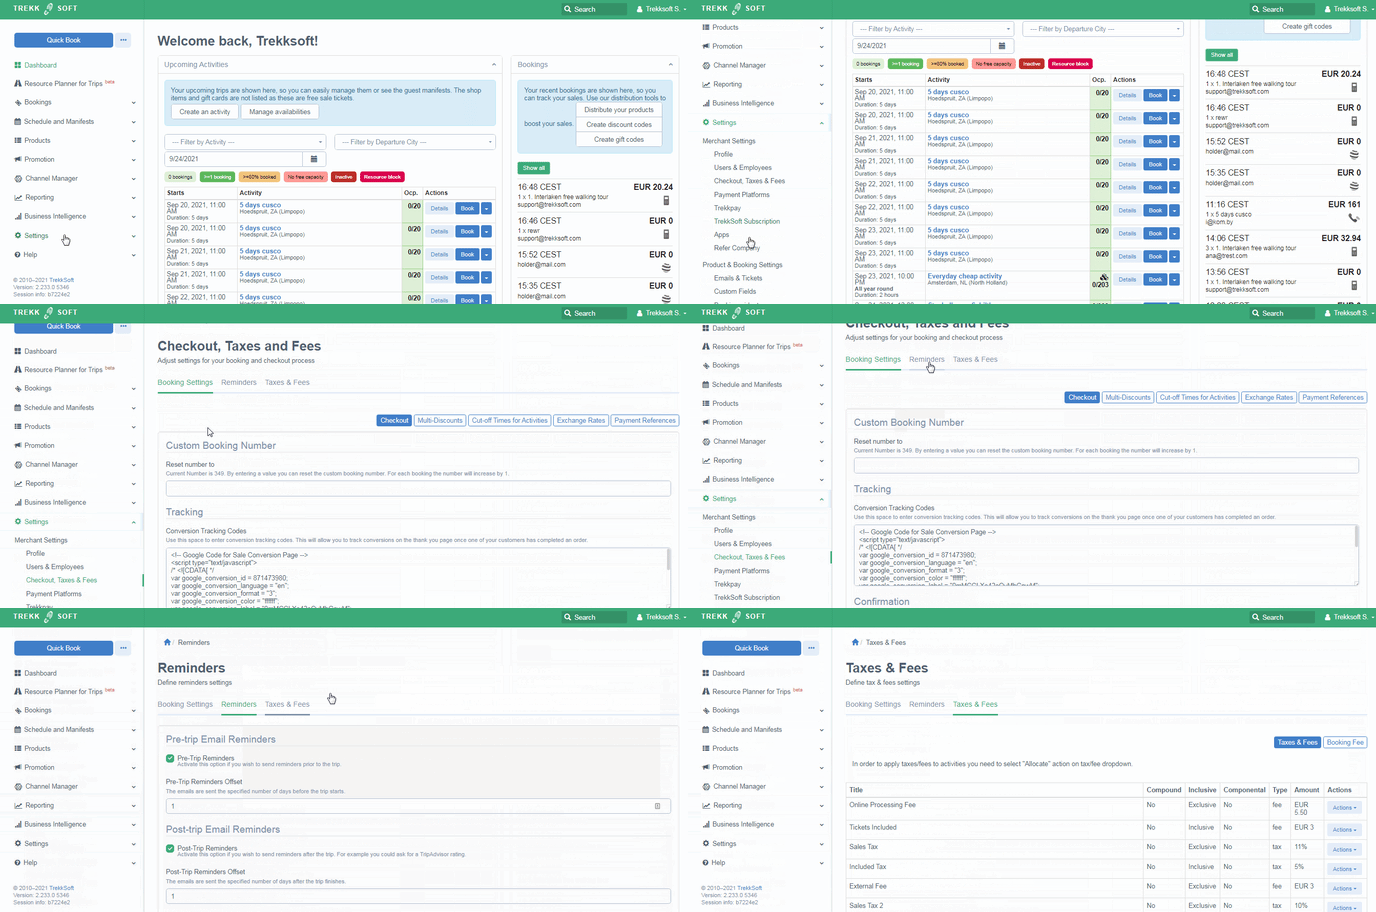
The Checkout, Taxes, and Fees menu is available by following the steps:
- Going to your Admin Desk
- In the main navigation, click on Settings > Merchant Settings > Checkout, taxes, and fees
(See the video below for additional help)
________________________________________________________________________
Booking Settings
There are 5 tabs in the Booking Settings Dashboard:

Let's review the 5 tabs in more detail.
Checkout
- Custom Booking Number: This option allows you to change the booking numbers that TrekkSoft randomly assigns to your baskets. Every time you want to start a new period, don’t forget to set it back to 1!
- Tracking: The tracking option enables you to enter tracking codes that need to be inserted in your booking process and/or thank you page.
- Confirmation: The confirmation options below are additional options you can add/remove to the email that is sent when the booking process has been completed by one of your guests/customers.
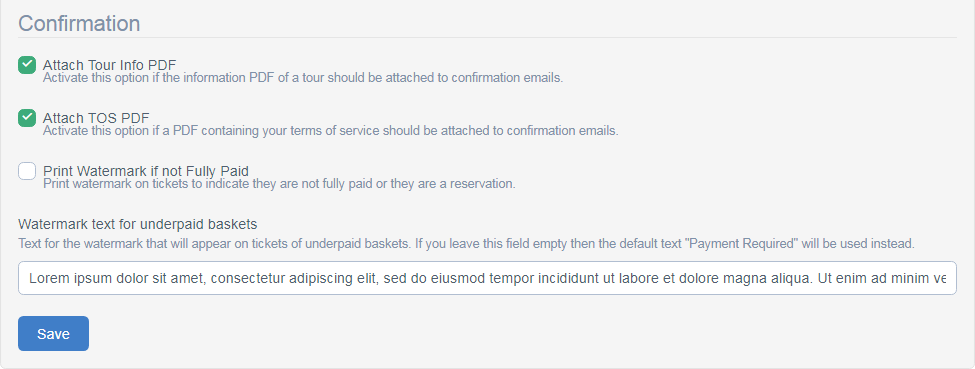
TIP: You can enable/disable options to make the guest aware the payment has not been completed, add additional information about the activity, Attach your Terms of Service, and Watermark the booking confirmation.
Multi Discounts
The multi discounts option allows you to enable a percentage discount automatically if a customer purchases 2 or more activities. There are options to book different discount amounts depending on the number of tours they book. See the screenshot below for further clarification.
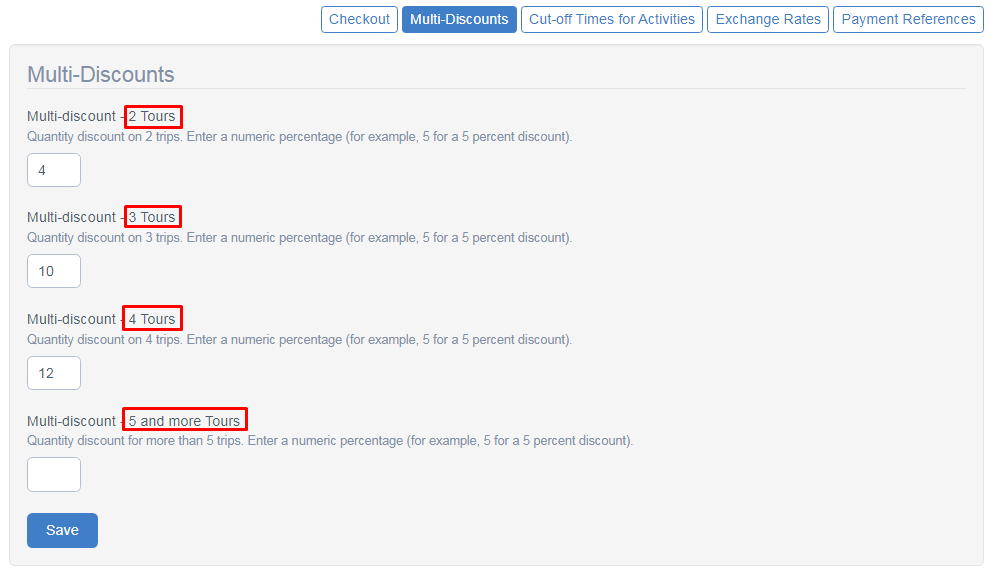
In the website builder, the multi discount banner will only show, when the first selected activity is enabled for multi discount. While in the Booking Widget, the banner will always show, even if the first selected activity is not enabled for multi discount.
Example: An activity is not enabled for multi discount, then after having added it to the cart, the multi discount banner will show that adding 2 additional activities will give a discount of 4%.

Cut-off Times For Activities
This section allows you to establish a default cut-off time for all your activities. Read more about cut-off times here.

Exchange Rates
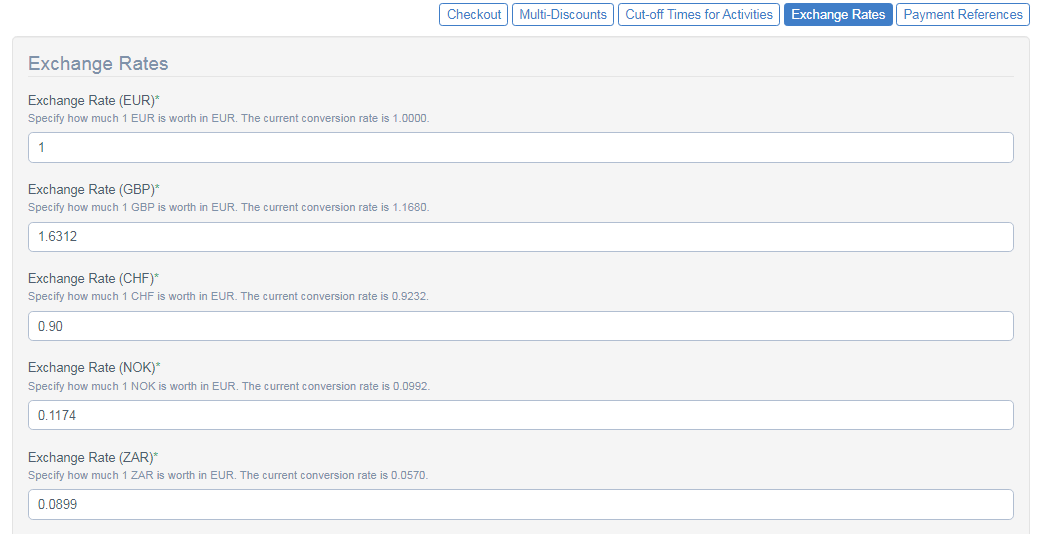
You can manage and customize the exchange rates for each of the additional currency setups for your account with respect to your default currency. Get more details on currency setup for your account here.
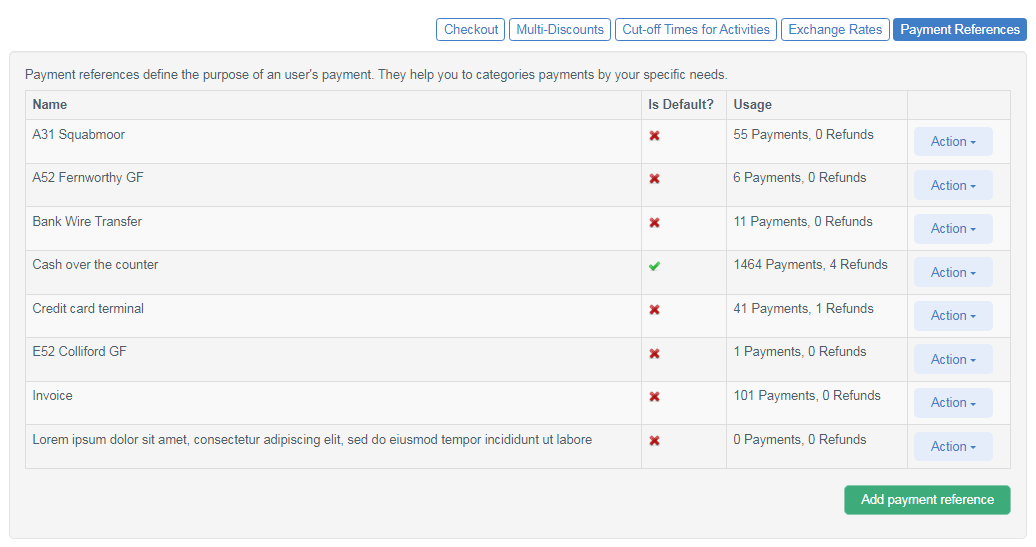
Payment references
Payment references help you to categorize payments by your specific needs. On this page, you can create as many payment methods as you require.
________________________________________________________________________
Reminders
The reminders section gives you the option to enable/disable pre-trip or post-trip emails or SMS messages to your guests. This means you can notify your guests of any important information before and after trips occur.
There are 4 options you can choose from:
- Pre-trip Email Reminders - Activate this option if you wish to send out reminders prior to the start of the activity.
- Post-Trip Email Reminders - Activate this option if you wish to send out reminders after the activity has been completed.
- SMS Pre-Trip Reminders - Activate this option if you wish to send out reminders prior to the start of the activity via SMS.
- SMS Post-Trip Reminders - Activate this option if you wish to send out reminders after the activity has been completed via SMS.
Note: Underneath each of the 4 options, is an 'offset' option. The offset option is used to state how many days before or after an activity you would like to send an email or SMS E.G. Pre-trip email reminders, if you set the offset as 1, an email will be sent one day before the activity begins.
Tip!
Pre Trip Reminders - The email/SMS can be used to remind your guests not to forget any equipment, a reminder of the activity details, to wear comfortable clothing for a hike, etc.
Post Trip Reminders - This option is good for getting feedback from your guests e.g. you can ask for your guests to rate your activity on TripAdvisor!
________________________________________________________________________
Taxes and Fees
TrekkSoft allows tour and activity providers to customize their booking systems by adding their own taxes and fees. This is great for companies that require guests to pay tolls or other costs that occur during activity.
Companies can also track different taxes that apply to their business using the accounting report, which will show which taxes each customer paid and displays each tax/fee individually. You can find more about reporting here.
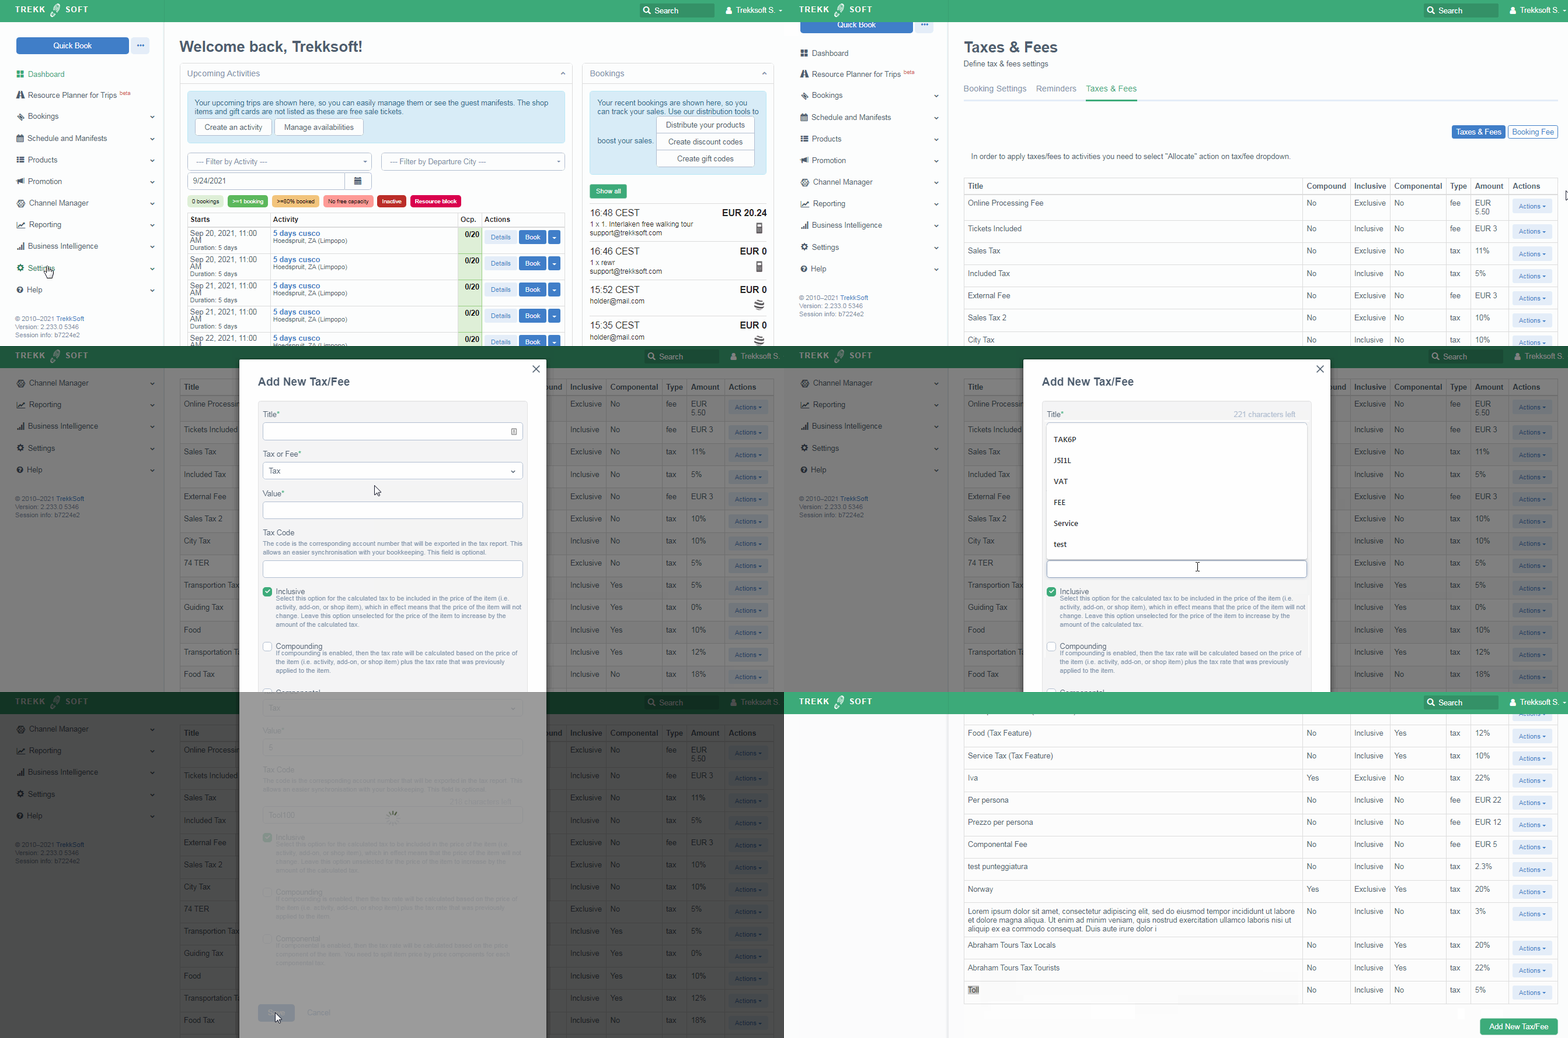
Creating a New Tax or Fee
To create a new tax or fee:
- Go to Settings > Merchant Settings > Checkout, Taxes & Fees
- In the tabs menu, select the Taxes & Fees tab
- Click the Add New Tax/Fee button. Now, complete each of the fields below:
-
- Title
The name of your tax or fee. - Tax or Fee
Select either “Tax” or “Fee”. Tax is calculated by taking a percentage, while Fees are fixed amounts that are added to the balance of an order. - Value
The value of your tax (a percentage) or fee (a fixed amount). - Tax Code
The code is the corresponding account number that will be exported in the tax report. This allows an easier synchronization with your bookkeeping. This field is optional.
- Title
-
- Inclusive
If this option is ticked, TrekkSoft will include the tax/fee in the cost of your activity or item. This means any existing prices will not be changed. If unchecked, this value will be added to your customer’s basket in addition to the cost of the item or activity. - Compounding
If marked, this new tax will be calculated based on the total cost of the activity or item plus any additional taxes or fees that have already been applied to the transaction. Otherwise, the original price of the item or activity will be used for the calculations. - Componental
This tax will be applied to the additional services you provide with your trips (food, transportation, insurance, etc). The value input will be a percentage of the total price of the service. You can catalog them on the taxes page and add them to your activities. To all of them, or just some of them.
- Inclusive
5. Once you have entered this information, click the Save button.
Taxes Report
Once you have added your custom taxes and fees, you can check the Taxes in the reporting section. To view your Tax Report:
- Go to Reporting > Sales > Turnover.
- In the tabs menu, select the Taxes & Fees tab (as shown below)
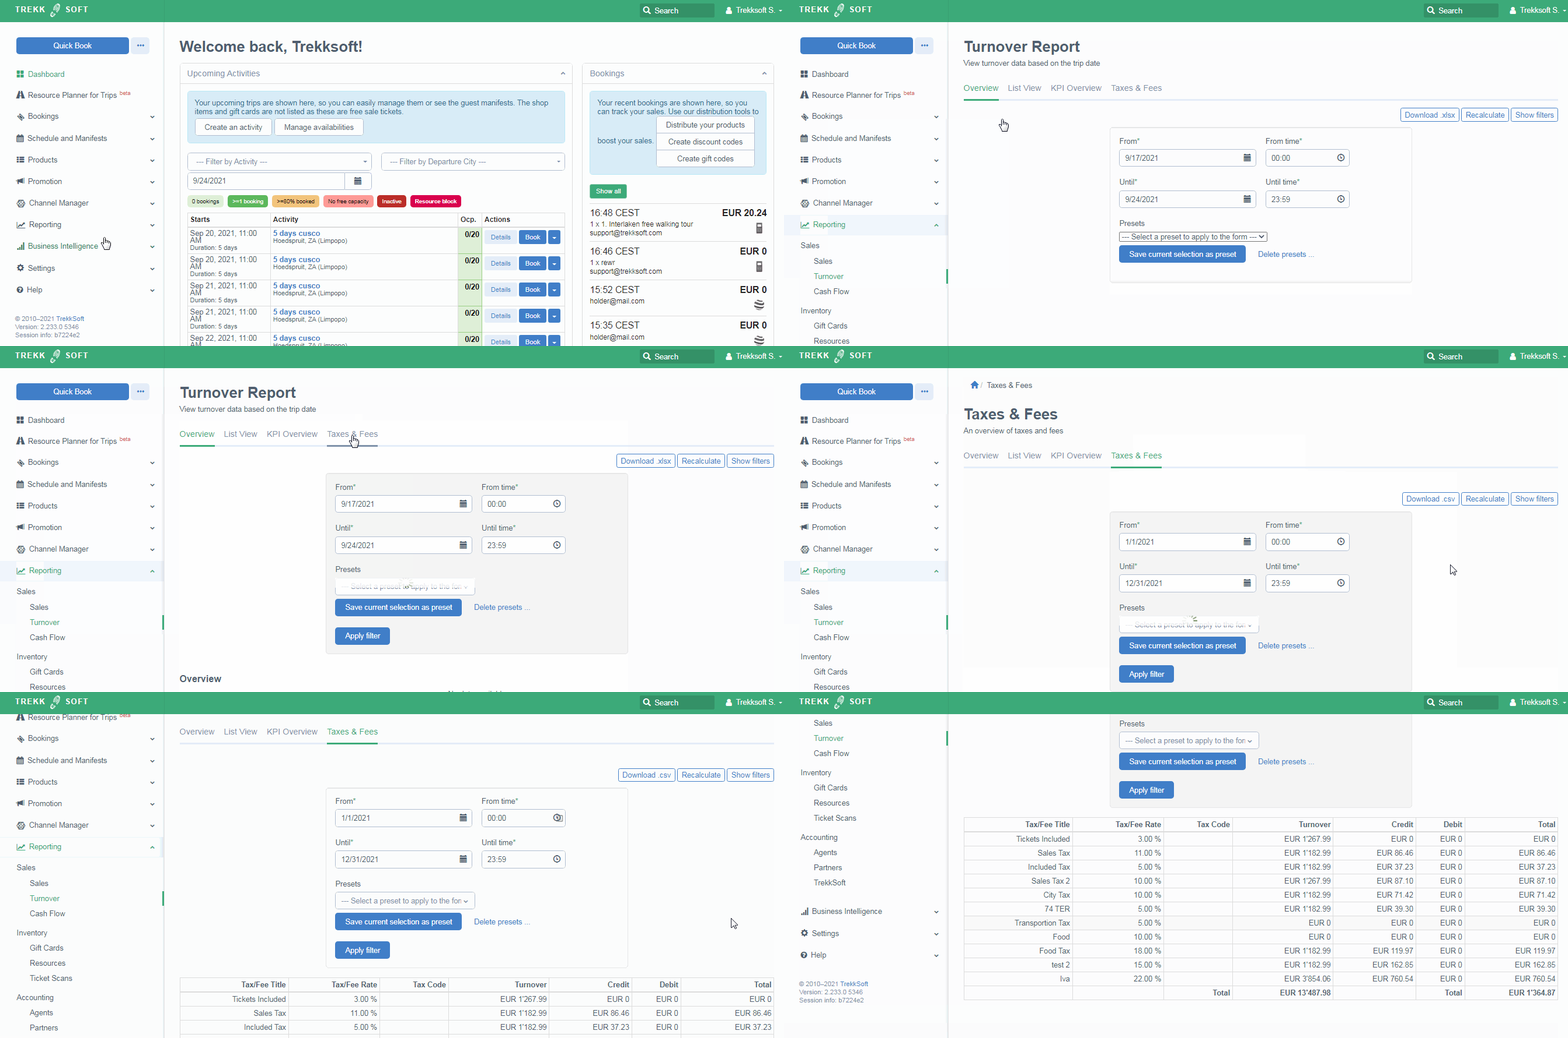
This report is very useful for keeping track of legal taxes that you are required to report, as well as recording any general expenses related to your business.
Find additional information on compounding and componental taxes and the tax report here.
Itemized PDF Receipt
When a customer makes a purchase, they will receive a separate receipt, highlighting each item and detailing any additional taxes or fees charged.
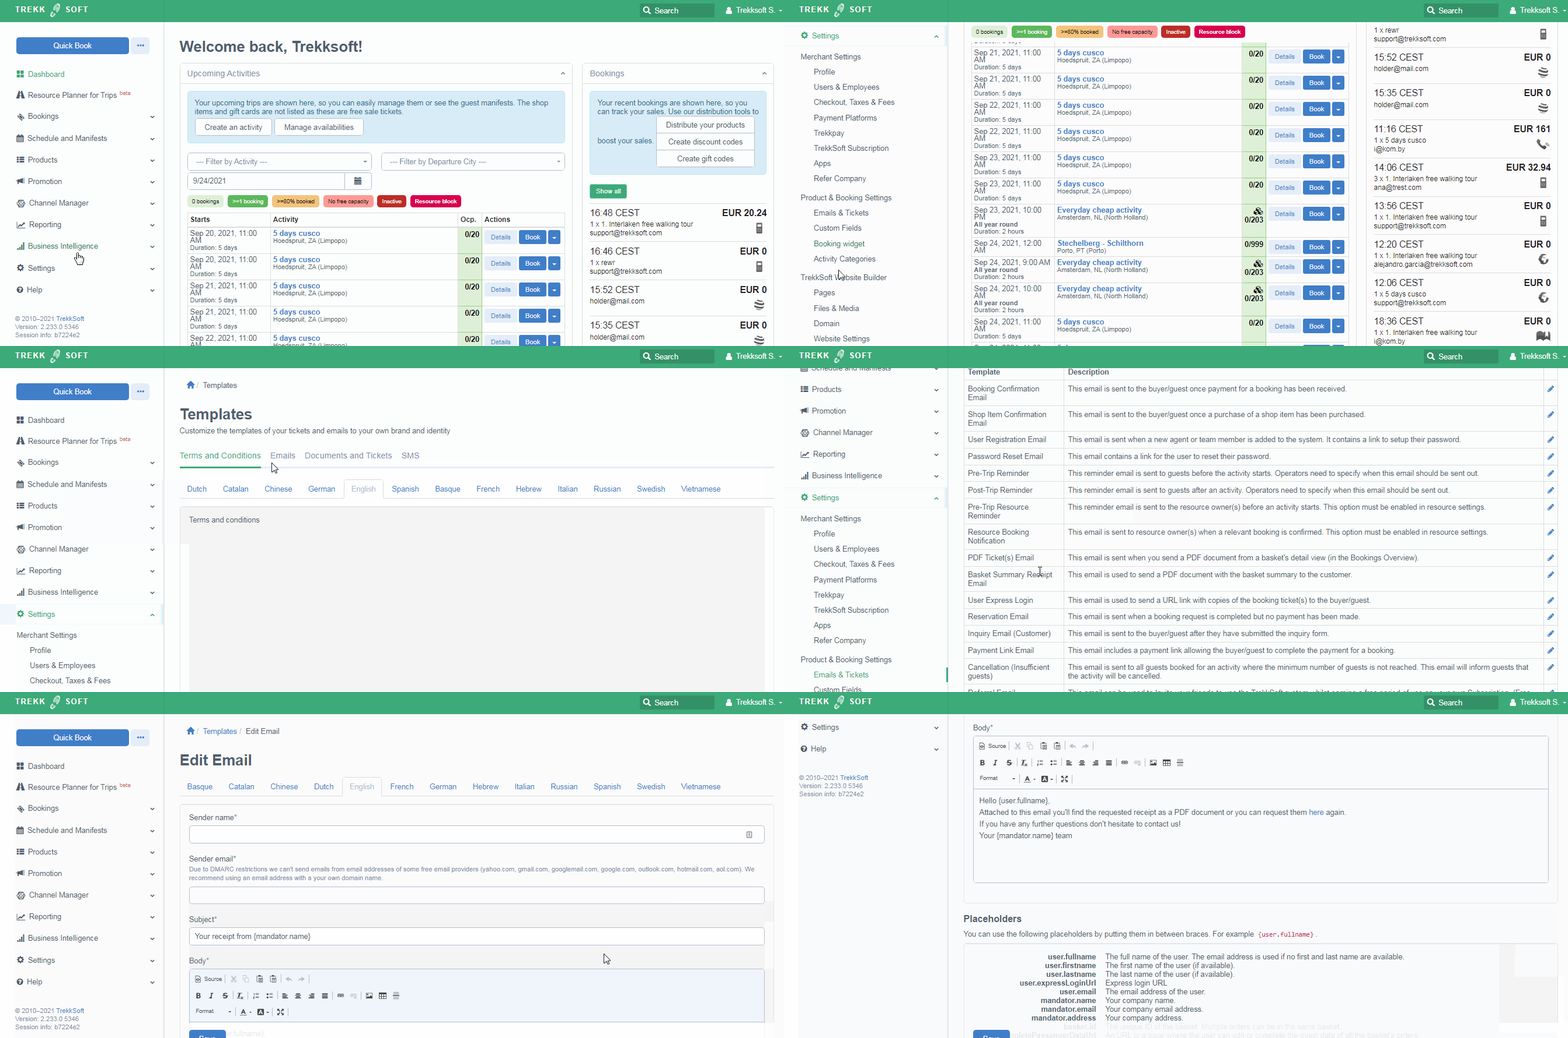
If you wish to edit this email, you should:
- In your Admin Desk, on the section of the left menu, go to Settings > Product & Booking Settings > Emails & Tickets
- Select the Emails tab.
- Scroll down to the 'PDF Ticket(s) Email' template.
- Click on the
 button on the right-hand side.
(See the video below for additional help)
Note: Any changes you make to the email, make sure to click Save!
Get more details on different email templates explained here.
Booking Fee
You can set up an Online booking fee for all the activities sold online from your website. This amount will be added to all orders paid online by credit card.

FAQ on Booking fee
- If a merchant sets up a booking fee of i.e. 0.50 cents and the activity, say EUR 100. Then the end customer pays EUR 100.50 right? >> Yes.
- The online commission from TrekkSoft is charged over EUR 100 or the 100.50? >> On the 100.
- The Payment Gateways commission from Payyo is charged over the EUR 100 or the 100.50? >> On the 100 as well.
