Last update [October 21, 2025]
Here's an overview of what we cover in this article:
________________________________________________________________________
Overview
The first page you see when you log in to your TrekkSoft account (aka Admin Desk) is the Dashboard. The Dashboard provides a general overview of your upcoming trips and activities, your latest bookings, and other useful links to help manage your bookings.
________________________________________________________________________
Dashboard For New Users
Before your store is activated (Usually for new users), your dashboard will show you the steps you need to take to complete the setup process and then enable your store!
Your dashboard will look like this:

________________________________________________________________________
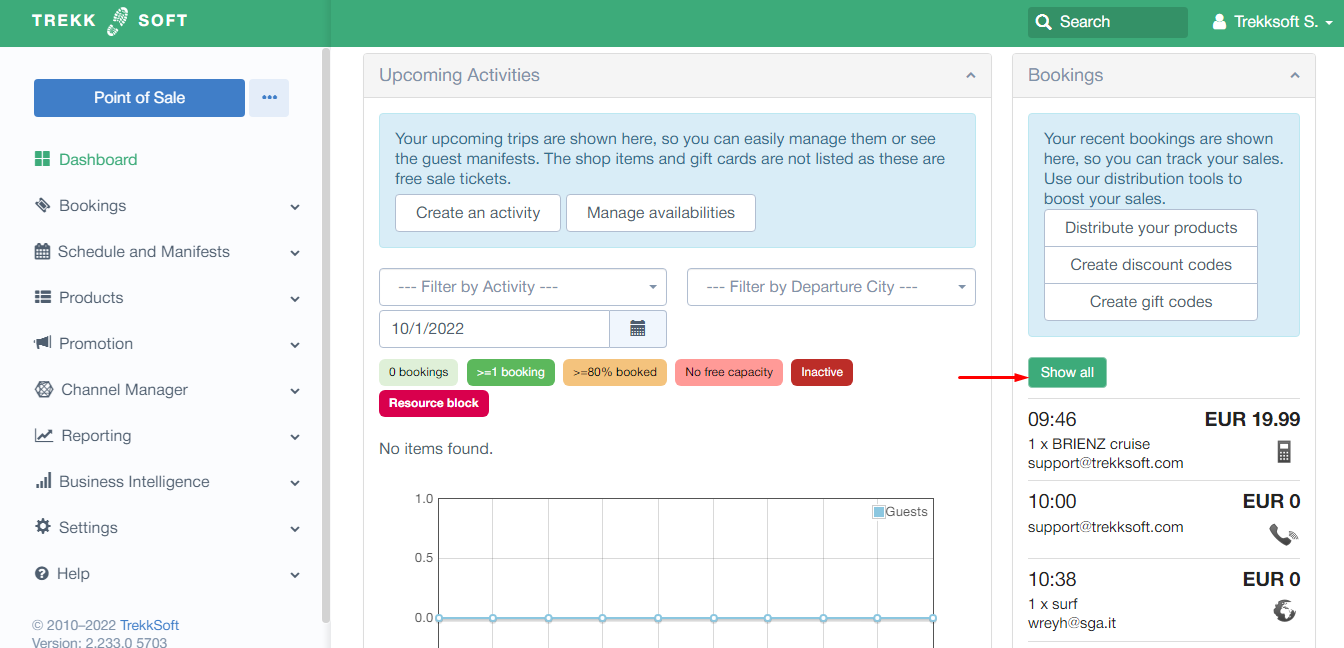
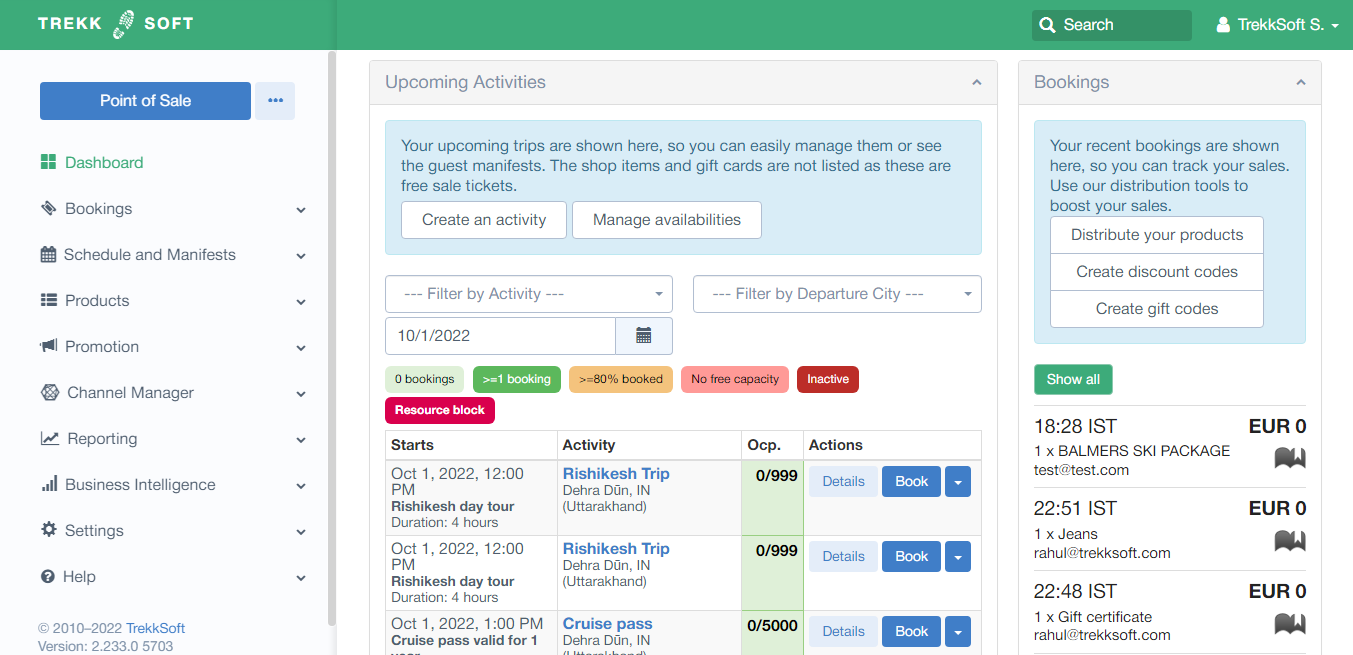
Your Main Dashboard
Once your store is enabled, your dashboard will show your upcoming activities in the center. On the right-hand side is a list of your latest bookings.
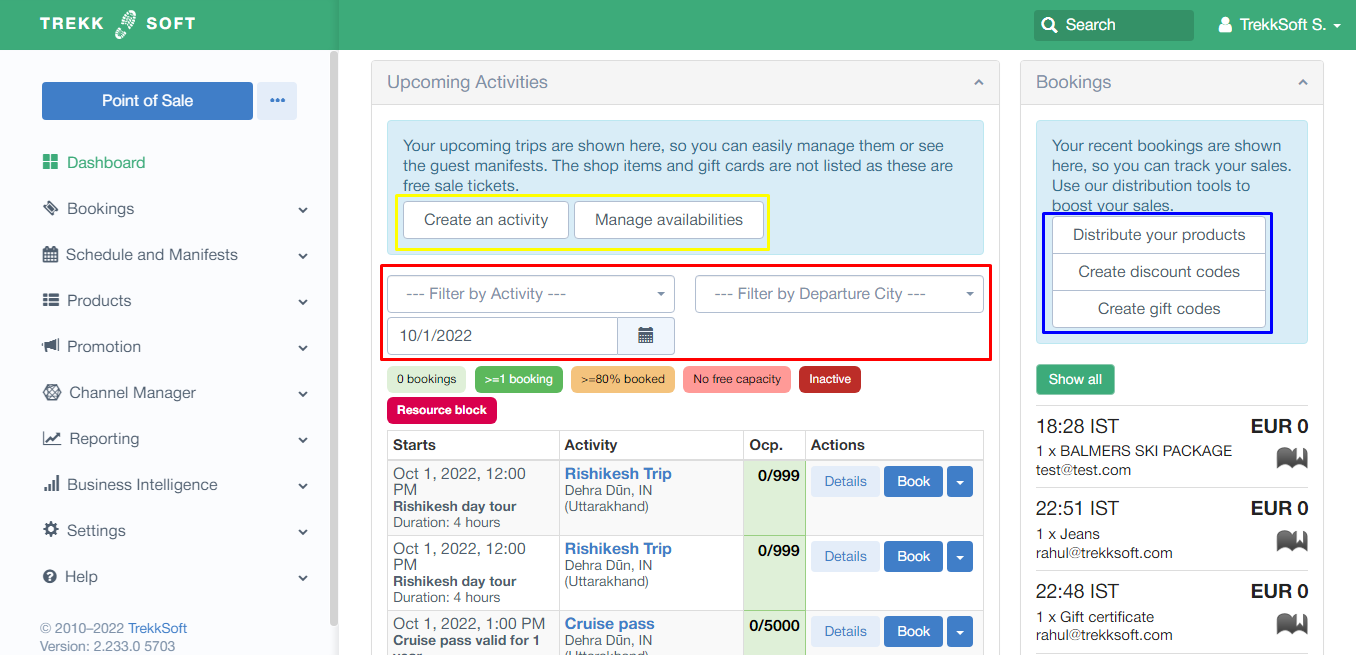
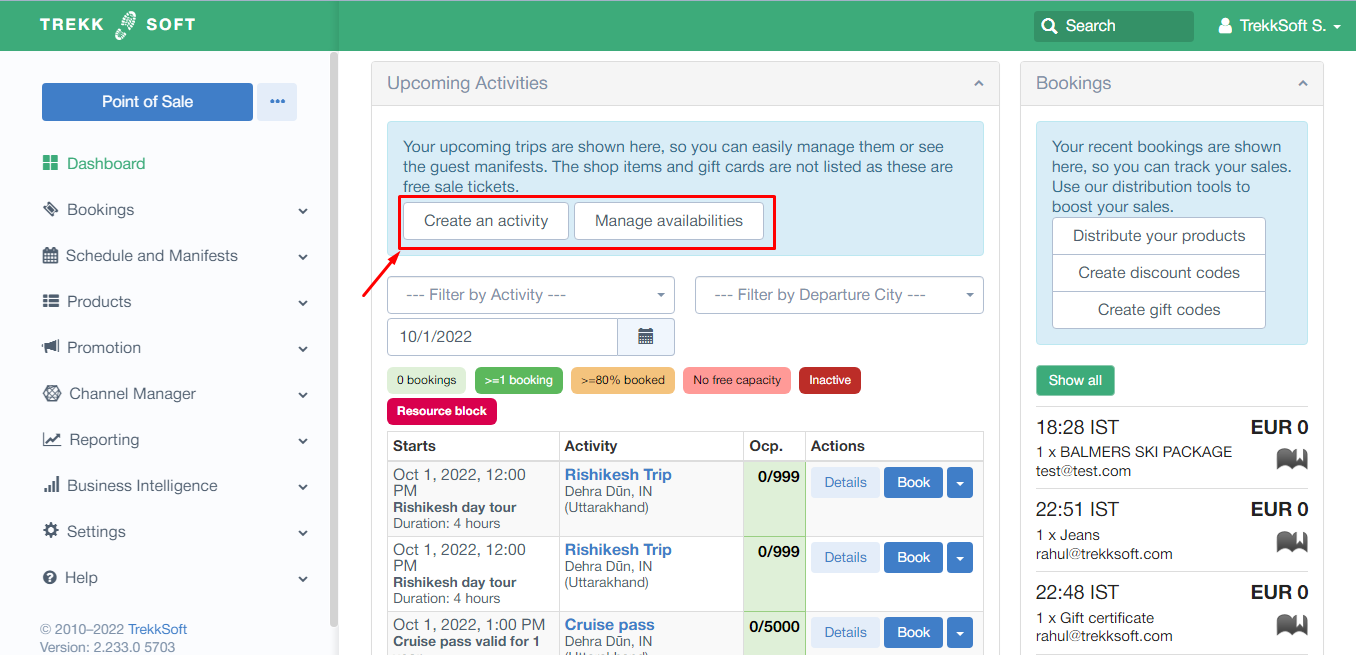
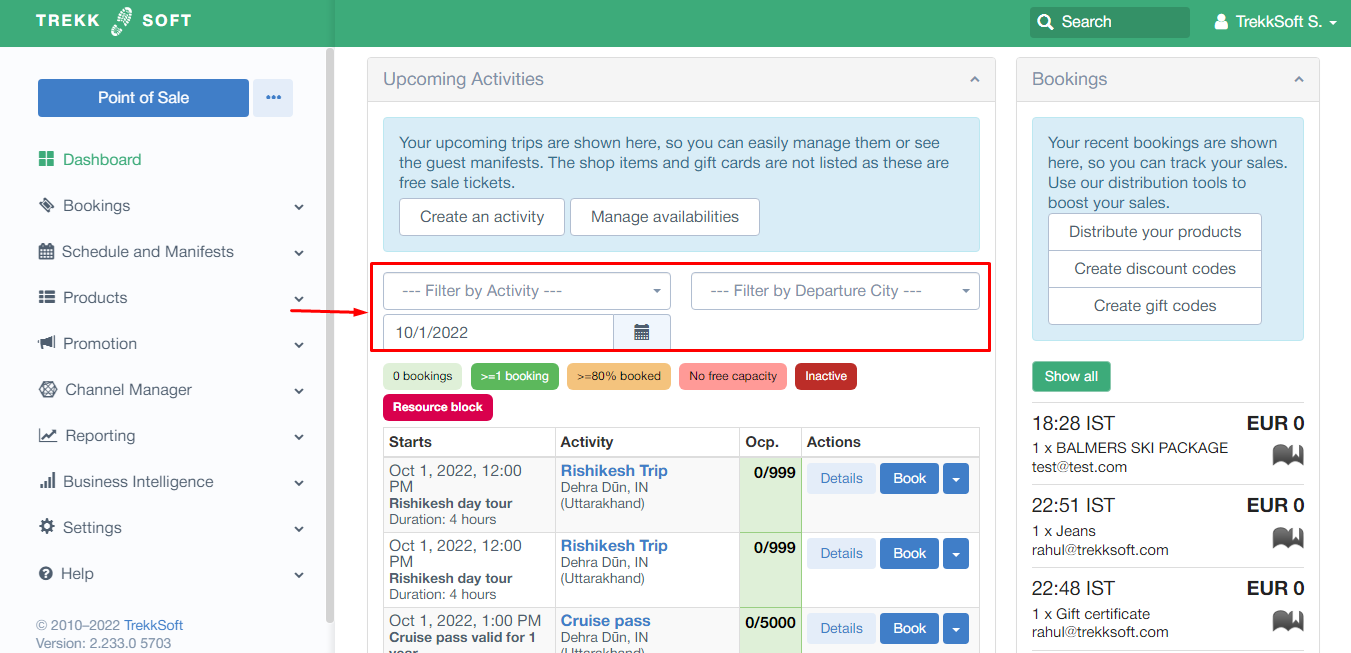
At the top of the dashboard, you’ll find the Upcoming Activities section where you have two buttons for quick access . The two buttons are:
- Create an activity - This takes you to the Activity Setup Page.
- Manage availabilities - This takes you to the Schedule View of your trip list.
Underneath, you will see a list of your upcoming trips. You can click on the Details button next to any of the activities to access the Guest Manifest of that particular activity. You can also filter this list by activity, departure city and start date by selecting one of the drop-down menus.
On the right-hand side of the dashboard, you will see your latest Bookings. There are three shortcut buttons to choose from (highlighted above in blue):
- Distribute your products - This takes you to the Marketplaces menu where you can apply for and edit your marketplace connections.
- Create discount codes - Create discount codes in conjunction with your business' campaigns and promotions. Discount codes reduce the price by a percentage.
- Create gift codes - Create voucher codes to reduce the price of a trip by a specific amount.
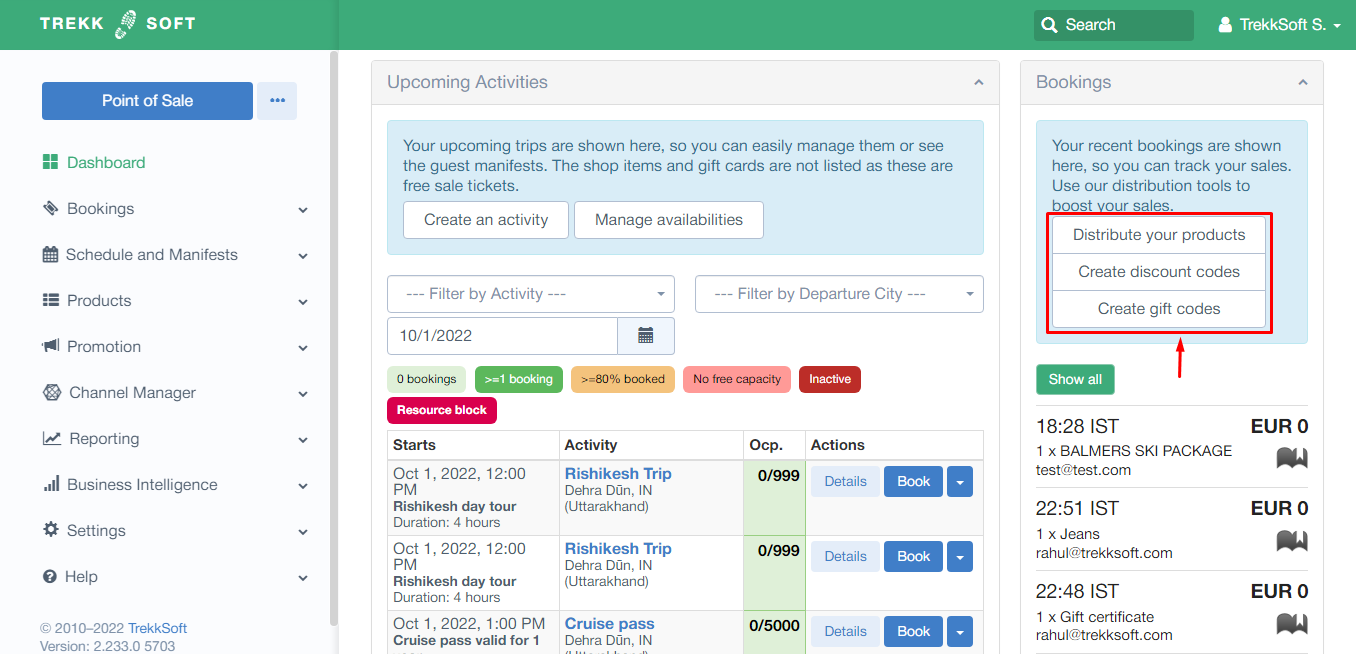
Below these three options is a summary of your most recent bookings. You can see when a booking was made, what activity was booked, how many seats were taken, who made the booking, how much they paid and through which booking channel. Each channel is indicated by an icon. The icons currently used are:
- A Phone - A mobile booking (via mobile phone)
- A Globe - A guest/customer booking on your website
- An Earpiece - An activity booked by an Agent
- A Smartphone - Generated via the Backend app
- Gears - Processed through the Booking widget
To see all of your bookings, you can click on the Show All button (highlighted above in green).