Last update [October 22, 2025]
Here's an overview of what we cover in this article:
________________________________________________________________________
Overview
Schedules exist so that your customers know when they can book a trip with you. Without scheduling, activity will not appear in the calendar and cannot be booked so it is important that any activity you wish to make available for booking, includes at least one schedule.
________________________________________________________________________
Schedule and Prices
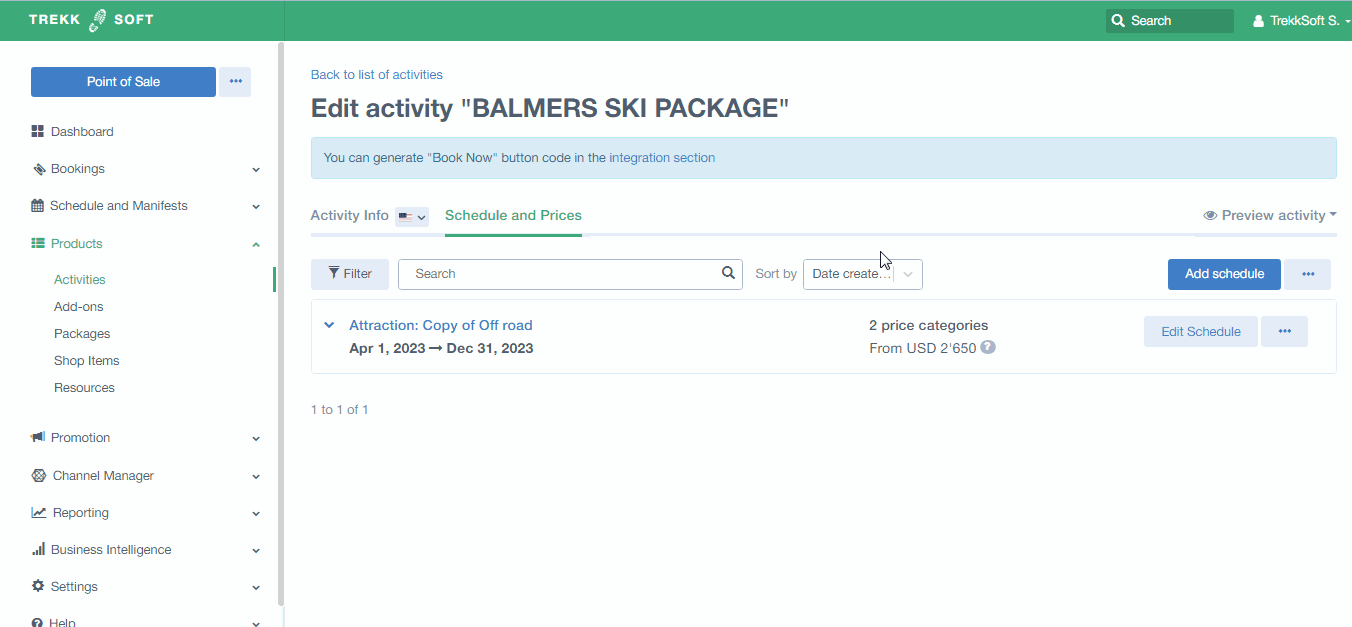
When you create an activity, the Add Activity Schedule will appear automatically in a pop-up window. You can also find this section by clicking on any Activity> Schedule & Prices tab and then the Add Activity Schedule button, as shown below:
________________________________________________________________________
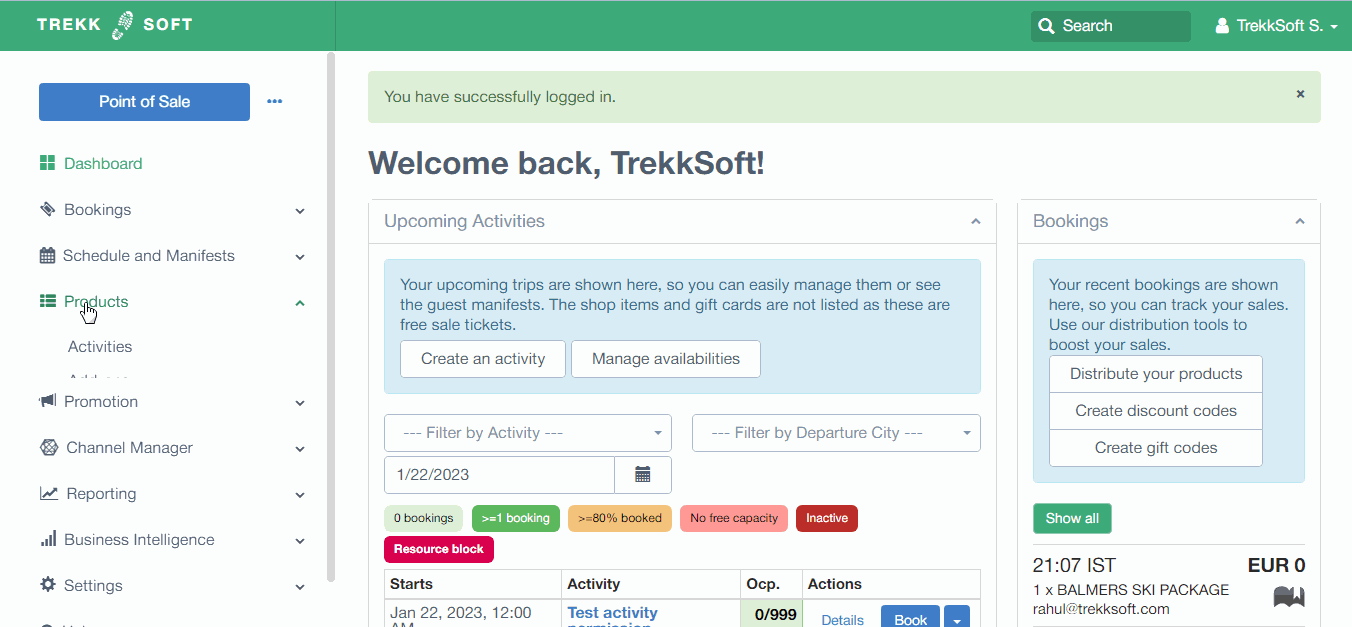
How To Create a Schedule
To create a schedule, first, choose one of the three options depending on which schedule you want to use. The Trip/Attraction schedule is the most commonly used by tour and activity operators.
The three options available are:
(a description is underneath each option as shown in the screencast below)To see all the schedule types available, check out the What can you sell section.
Now, enter the details for this schedule listed below:
- Capacity - The number of people you can take on each trip. When this has been reached, the system will no longer accept bookings for this time slot.
- Start Date - To indicate when you want this schedule to begin.
- Repeat on - You can set up a recurrence for your schedule by selecting the days of the week this activity will be occurring.
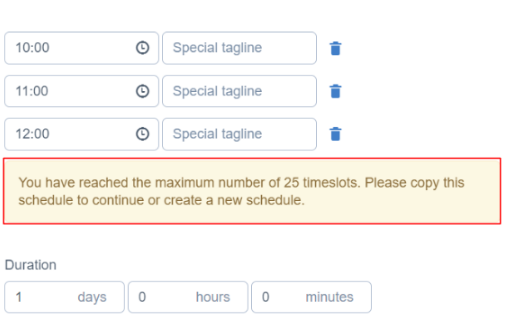
- Start Time - Click the blue Add more departures button to set one or more start times. If you skip this step, your schedule will last from 00:00 to 23:59.
- Number of time slots limited to 25 (for new created schedules). You'll see the following message in the schedule set up now. As soon as you reach the limit, it suggest to copy existing schedule to continue or to create a new one.
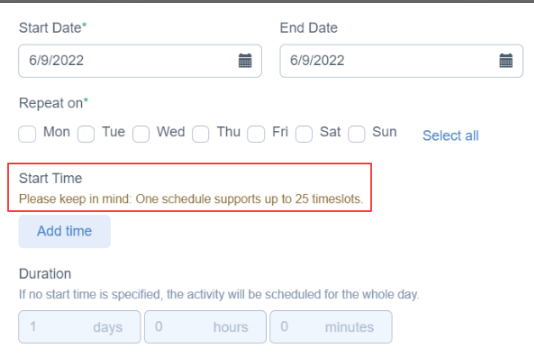
- End date - You can set up an end date if your activity is not a one-time deal.
Note: Some Subscriptions are limited to taking bookings up to 12 months in advance only. Ultimate and Enterprise are able to take bookings up to 24 months in advance.
________________________________________________________________________
Advanced Options
The advanced options provide you with additional features better suit how you would like to set up your activity.
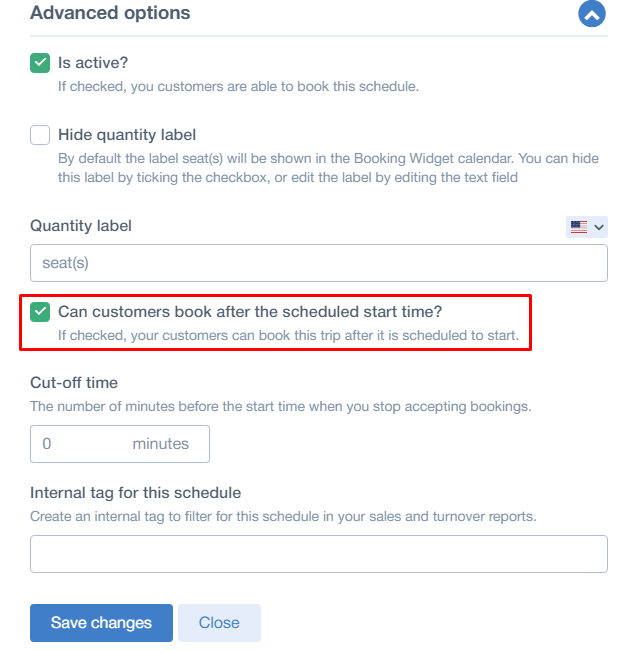
Is active?
IMPORTANT: Mark the schedule as active. If left unchecked, the schedule will not be bookable.
Quantity label for booking widget
- Label editing is now possible which gives us more flexibility. We can choose a custom quantity label that is shown on on the booking widget when looking for available slots.
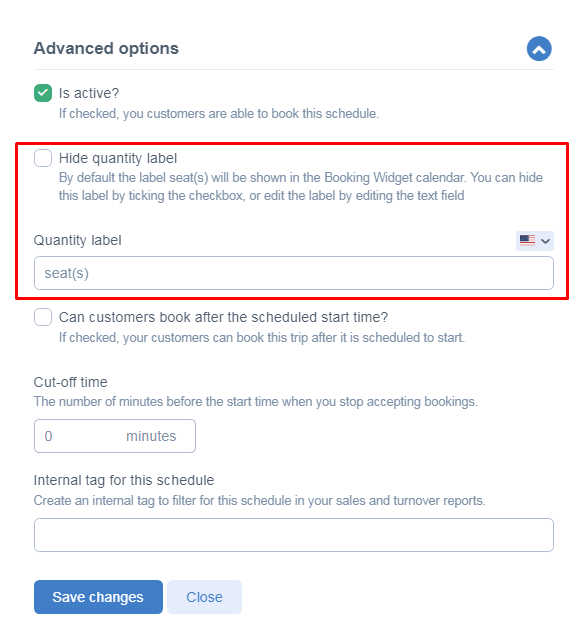
- You can now edit the label (default: seat/s) that shows up in the time slot selection in booking widget calendar. Edit in the schedule part (incl. option to translate).
- If we hide the label, then only "XX available" will show.
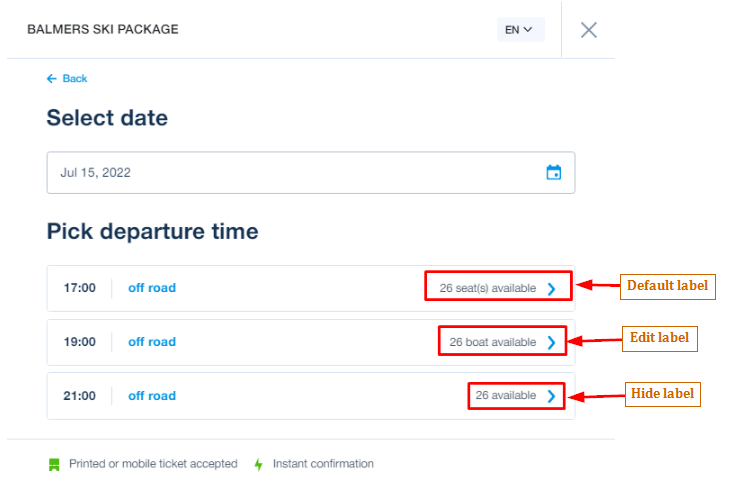
- Also, if a schedule has this quantity label edited, this will show the same also in integrated packages
- Please keep in mind, due to limited space, we will always show "XX available" on mobile view of booking widget.
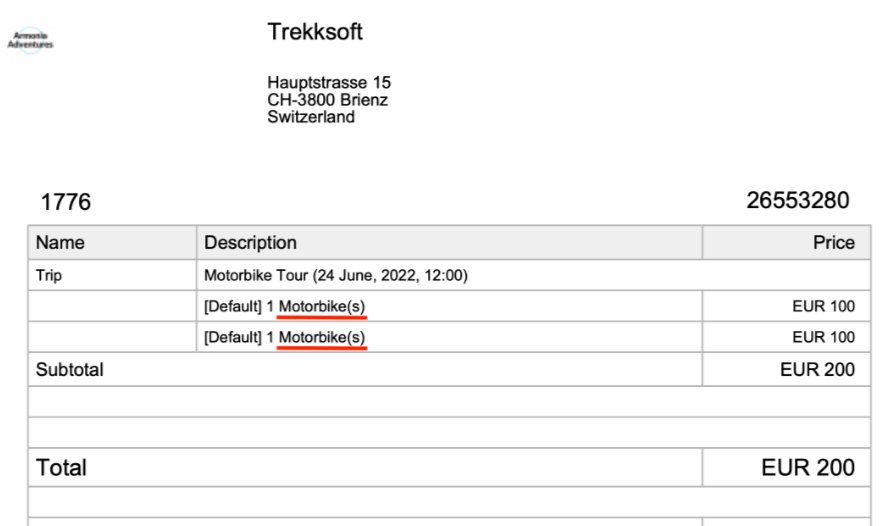
- This changed label will also be visible on the belonging receipt, so there is no confusion for the end client anymore. If the label is hidden, then we show item/s on receipt.
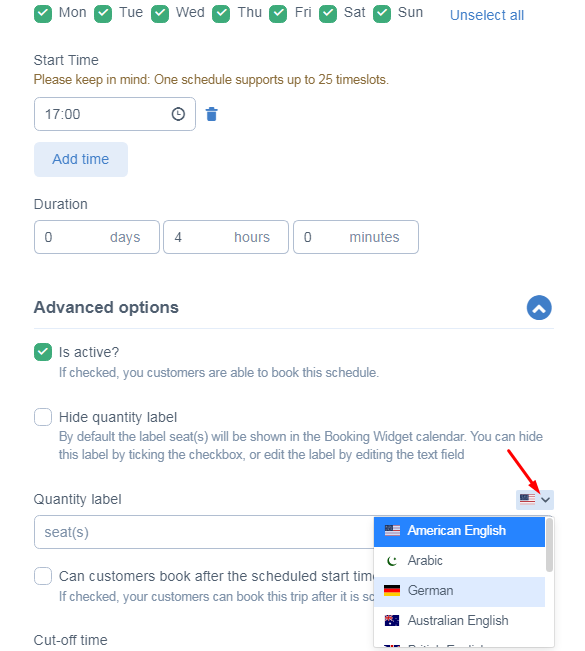
- Translation for this section is available also. Just click on the language drop down list next to the field and put the translations that will then reflect on the related version on widget.
Can customers book after the scheduled start time?
Check this box if you want to allow customers to book a trip/activity after the actual start time has begun. This can be very useful if you want to allow last minutes guests to join.
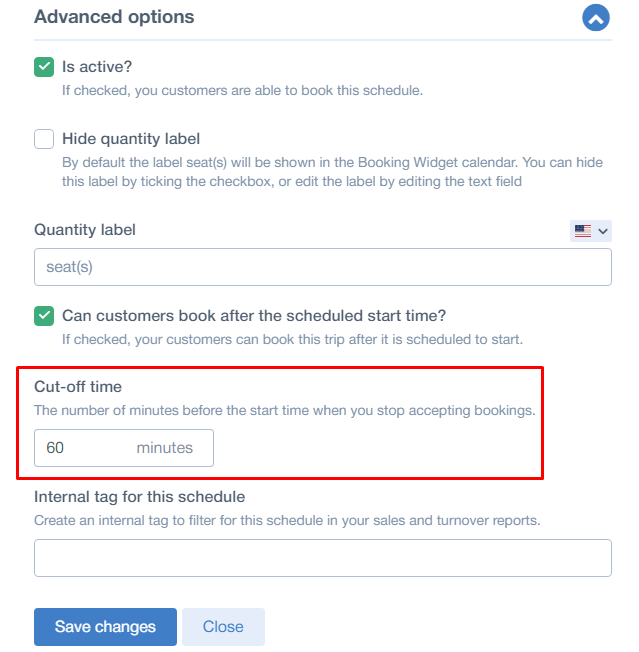
Cut-off time
In minutes, enter your cut-off time. This will determine when the system automatically stops accepting bookings before a scheduled activity. If your cut-off time is 60 minutes, customers can not book this time slot 60 minutes prior to the start of an activity.
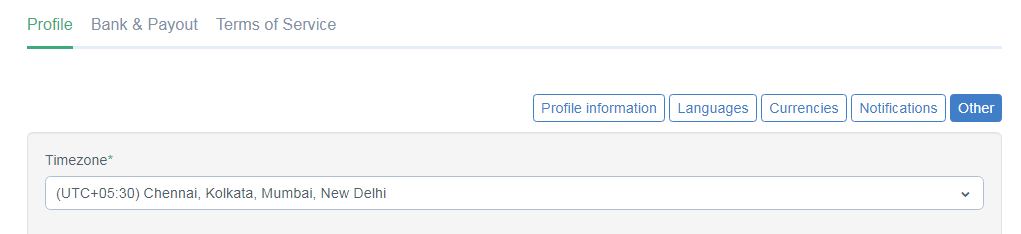
IMPORTANT! Please make sure to select the desired time zone of your country/locality here (Settings > Merchant Settings > Profile > Other) to reflect the cut-off time correctly on the activity schedule.
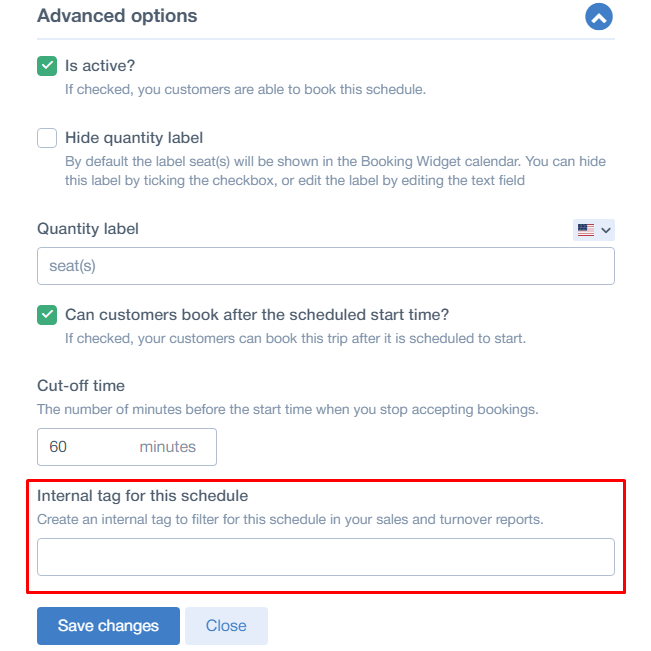
Internal tag for this schedule
This is used for reporting purposes to analyze trends, demand, etc. You can use it to categorize and use filters such as language, time of day, or any other specific details you wish to note.
IMPORTANT! Make sure you save your activity by clicking the Add Activity Schedule button at the bottom of the pop-up window. Once saved, you will automatically see the Price Category creation page.
Video tutorials index:
- Schedule for Attractions
- Schedule for Trip/Attraction
- Schedule for Activities
- Schedule for Private Tours/Activities
- Schedule for Private Transfers/Charters
- Schedule for Regular Tours