![trekksoft-whitelogo.png]](https://support.trekksoft.com/hs-fs/hubfs/trekksoft-whitelogo.png?height=30&name=trekksoft-whitelogo.png)
Here's an overview of what we cover in this article:
- Integrate widget as
- Open widget in
- Language
- Customize widget for Agent
- Customize Book Now text
- Floating cart
- Colors
- Embed View
- Ligth & Dark Mode
________________________________________________________________________
Additional option
Integrate widget as:
You can choose the integration type you would like to use as per your requirement from here.
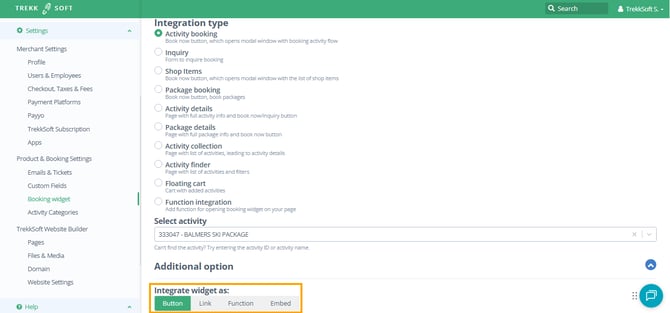
- Button: This is useful when you would like to display a button on your website.
- Link: This is useful if you would like to generate a link to the widget for your website. The generated link can be used with an existing button on your website.
- Function: This is for the advanced user. This is useful if you would like to add a function to open a booking widget on your website. Get more details on how to integrate this type here.
- Embed: This approach is useful if you want to embed a widget on your website in a way similar to an iFrame, but with improved security and flexibility. It eliminates the need for iFrames while still allowing you to control the size of the embedded content. You can specify dimensions using fixed pixel values—for example, 600px by 500px—or make the widget responsive by using percentages, such as 30% by 50%. This responsive option ensures the widget adjusts automatically to different screen sizes, including mobile devices.
IMPORTANT NOTE!
In some cases, when using the Embed View of the widget, the customer may not be redirected to the payment page because their browser is blocking pop-up windows. To proceed, they will need to enable pop-ups for the page.
________________________________________________________________________
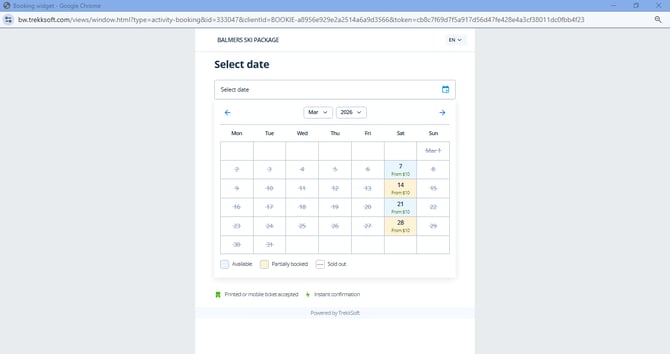
Open widget in:
You can choose the open widget type you would like to use as per your requirement from here.
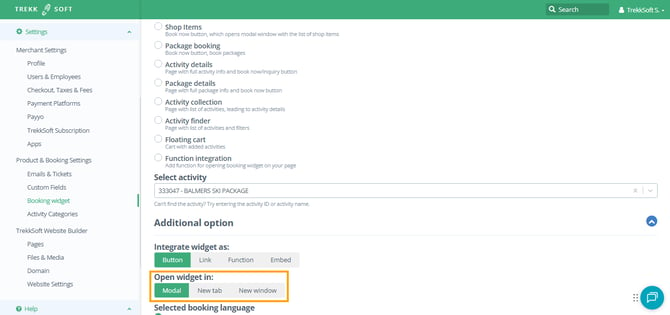
- Modal: This is useful when you would like to open a widget as a Modal/Pop Up on your website.
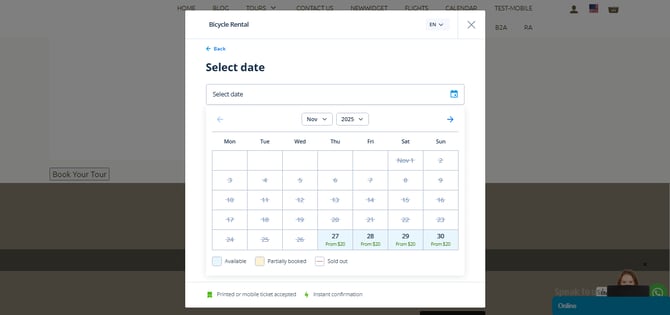
- New tab: This is useful if you would like to open the widget in the New tab of the browser.
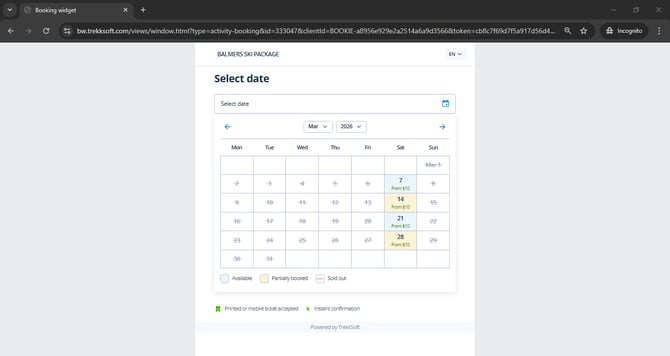
- New window: This is useful if you would like to open the widget in the New window of the browser.
________________________________________________________________________
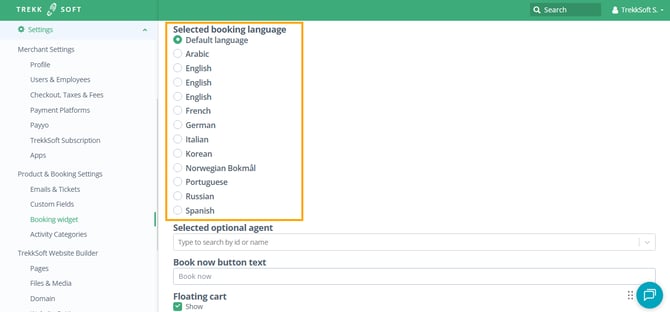
Language
You can choose which language should be used first when someone opens the booking widget, so it matches the language of the page where you place it on your website
________________________________________________________________________
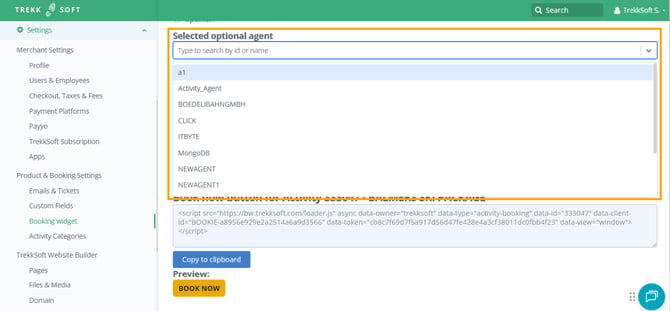
Selected optional agent
You can allocate an Agent to your `Book Now` button, so you can track how many bookings are coming from an agent's website and track the Agent Commissions as well.
________________________________________________________________________
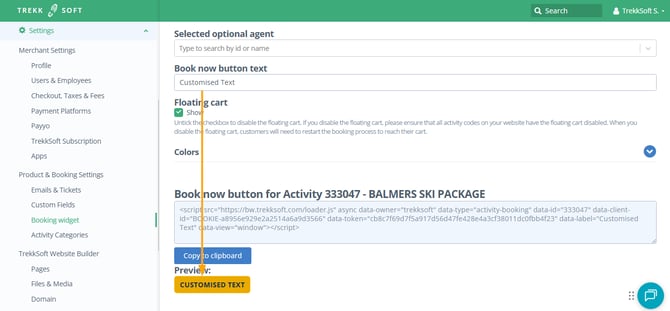
Book Now button text
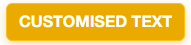
If you would like to change what text appears on the button instead of Book Now
________________________________________________________________________
Floating cart
This is useful when you would like to keep track of the pending booking in the booking widget. You can hide or display the cart on your website from here. See the screencast below showing where to find this option:

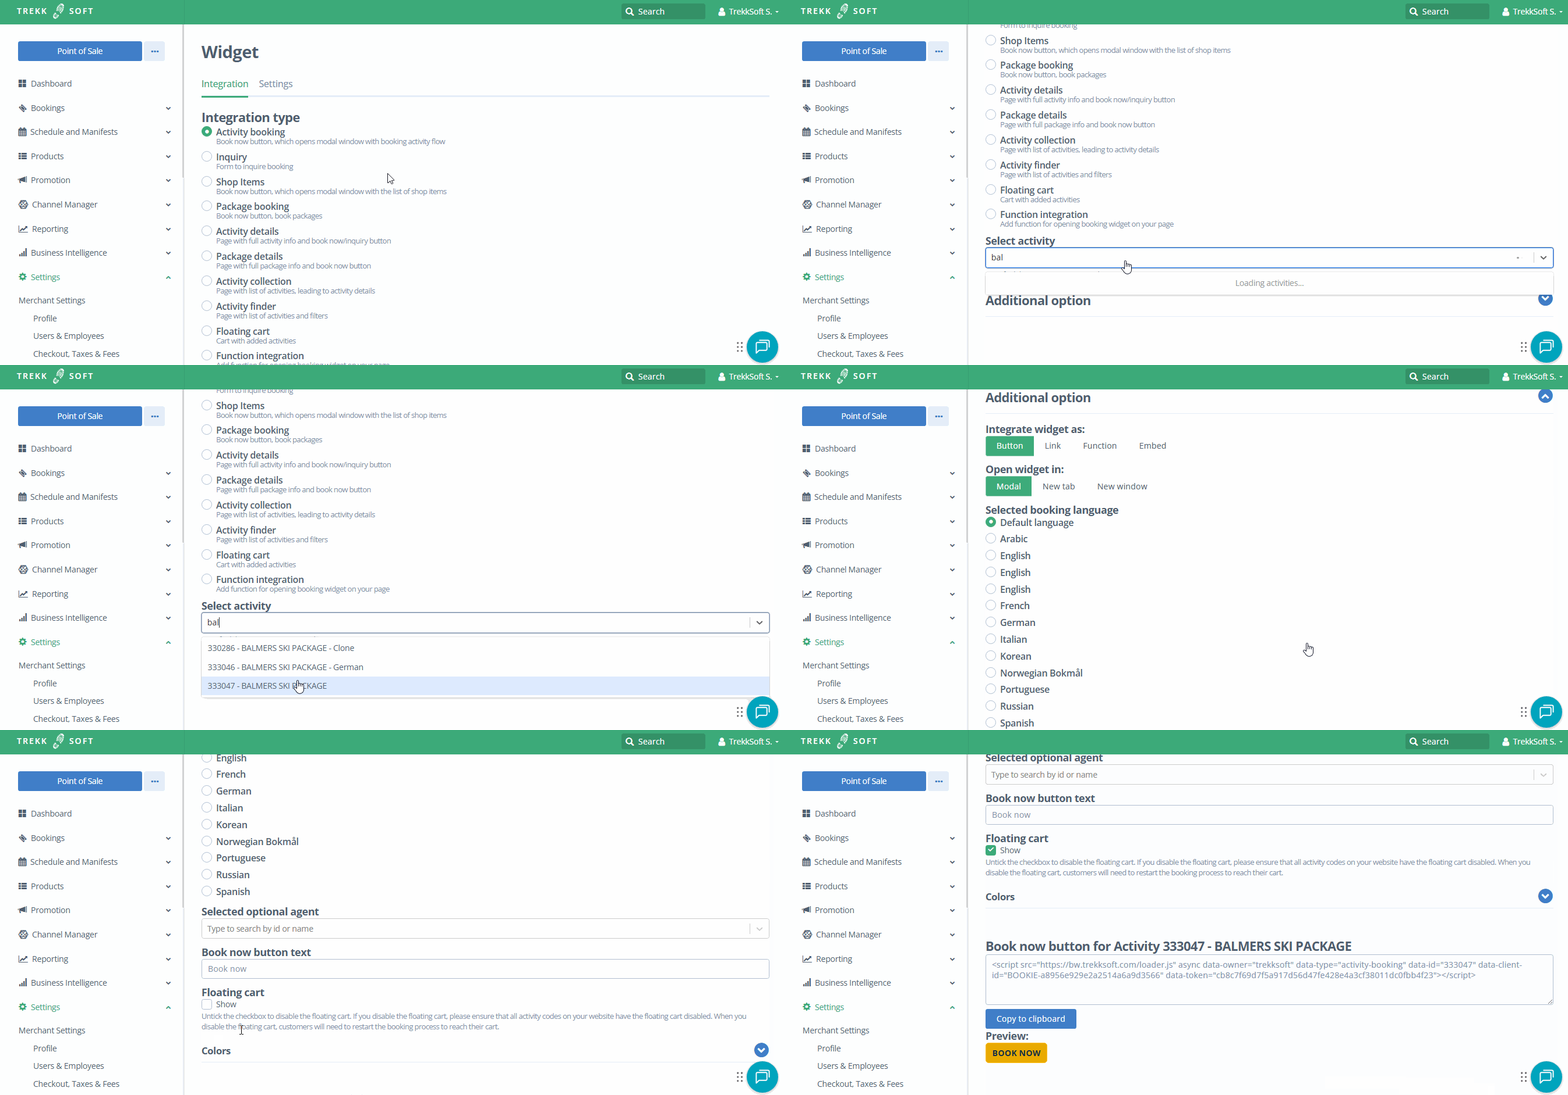
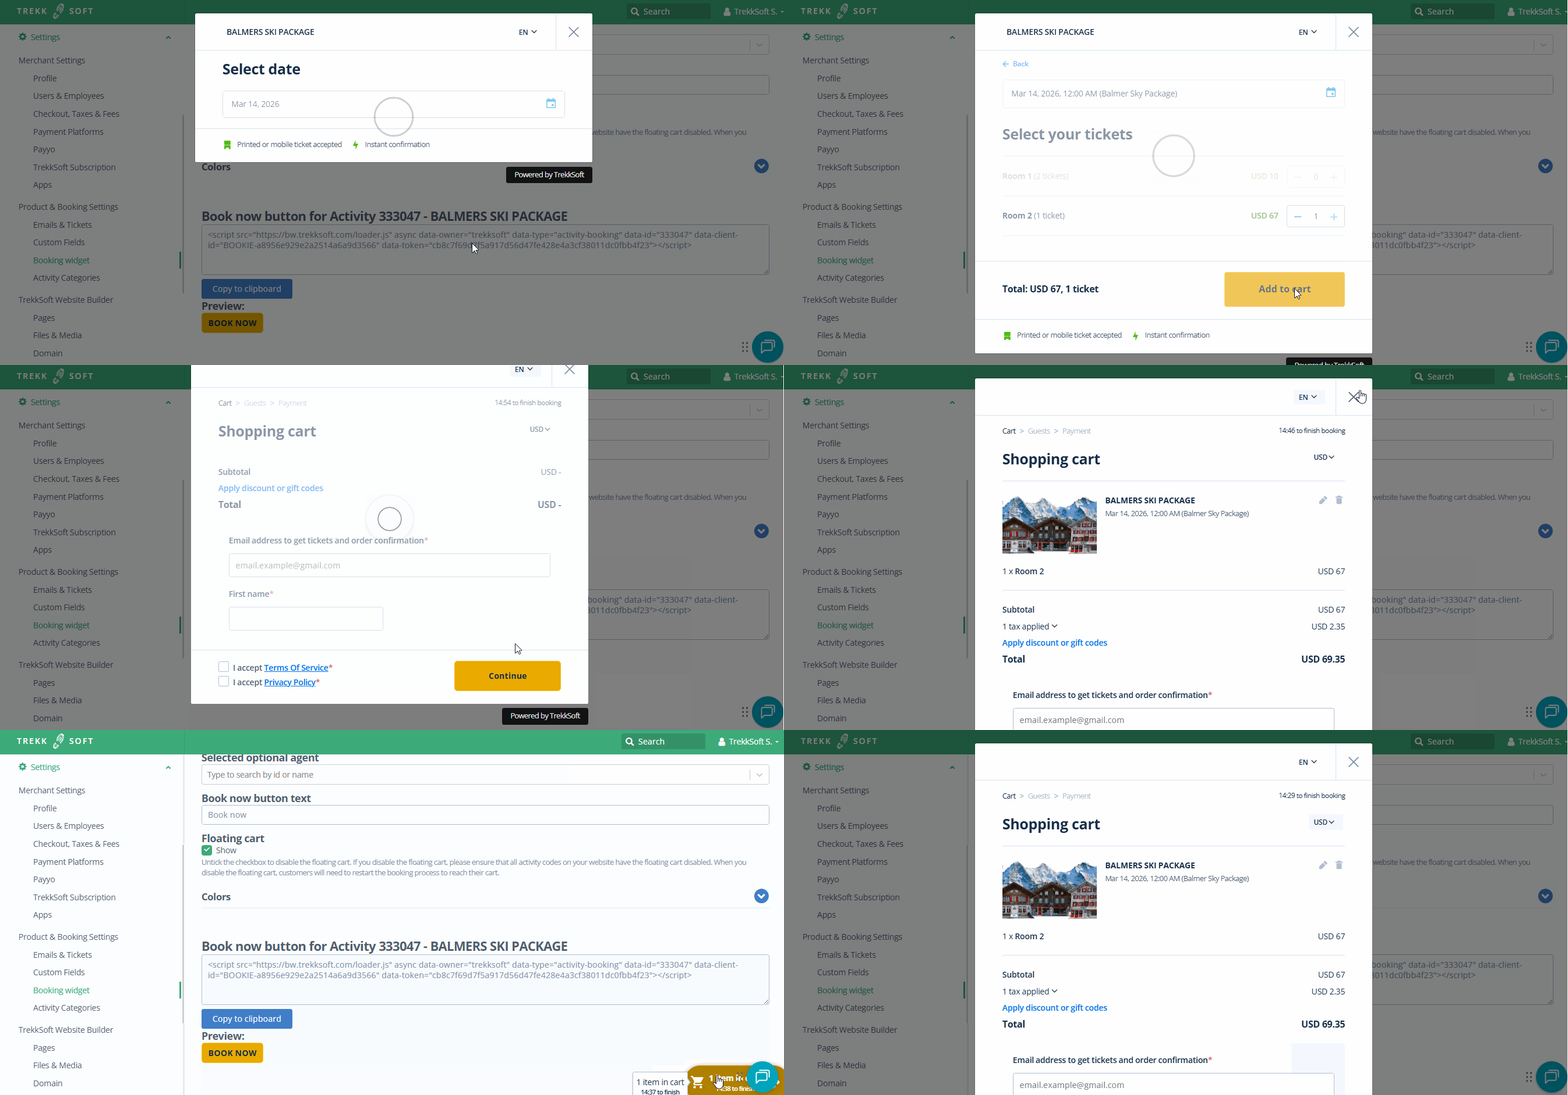
IMPORTANT NOTE
- If you disable the floating cart, please ensure that all activity codes on your website have the floating cart disabled. When you disable the floating cart, customers will need to restart the booking process to reach their cart.
- If this floating cart option is checked, a floating cart will be visible on the same page where there is a Book Now widget integrated even the widget window is closed but going to another page there won't be any floating cart visible. To reflect the floating cart throughout the website, integrate with Floating cart widget type. Get more details about Floating Cart widget type here.
________________________________________________________________________
Colors
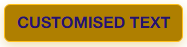
You can choose what color the text and background color of your Book now button should be by default and when someone is hovering over it. Please see the example below.
We have selected these colors:
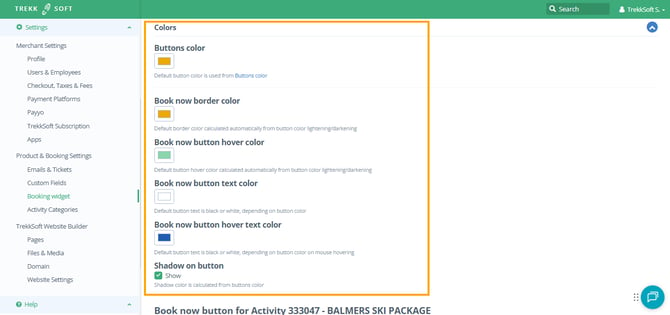
This is how the button looks by default:
This is how it looks when I hover over it:
- ________________________________________________________________________
Embed View
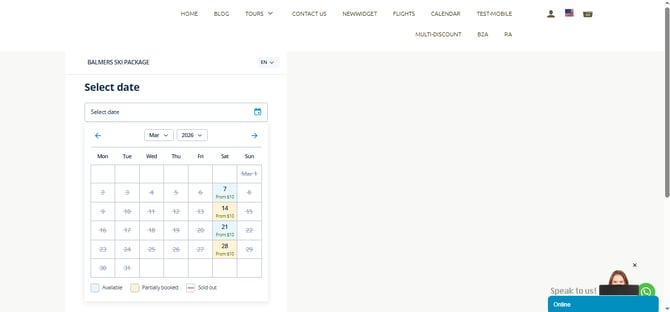
The embed view comes as an easy alternative to iFrame users, offering a more secure and easier implementation solution for embedding the TrekkSoft widget into your site. See the preview of the embed widget on the website.
IMPORTANT TIPS!
Tip 1. Note that you have to set the size the embedded widget will have on your site. It can be set by pixels or percentage by typing in "50%" for example. This will set it to 50% of your page width.
Tip 2. There is a minimum height of 450 pixels to avoid display issues. This can be overridden but is only recommended for expert web designers.
Follow the steps in the screencast below to access the Embed option for the widget.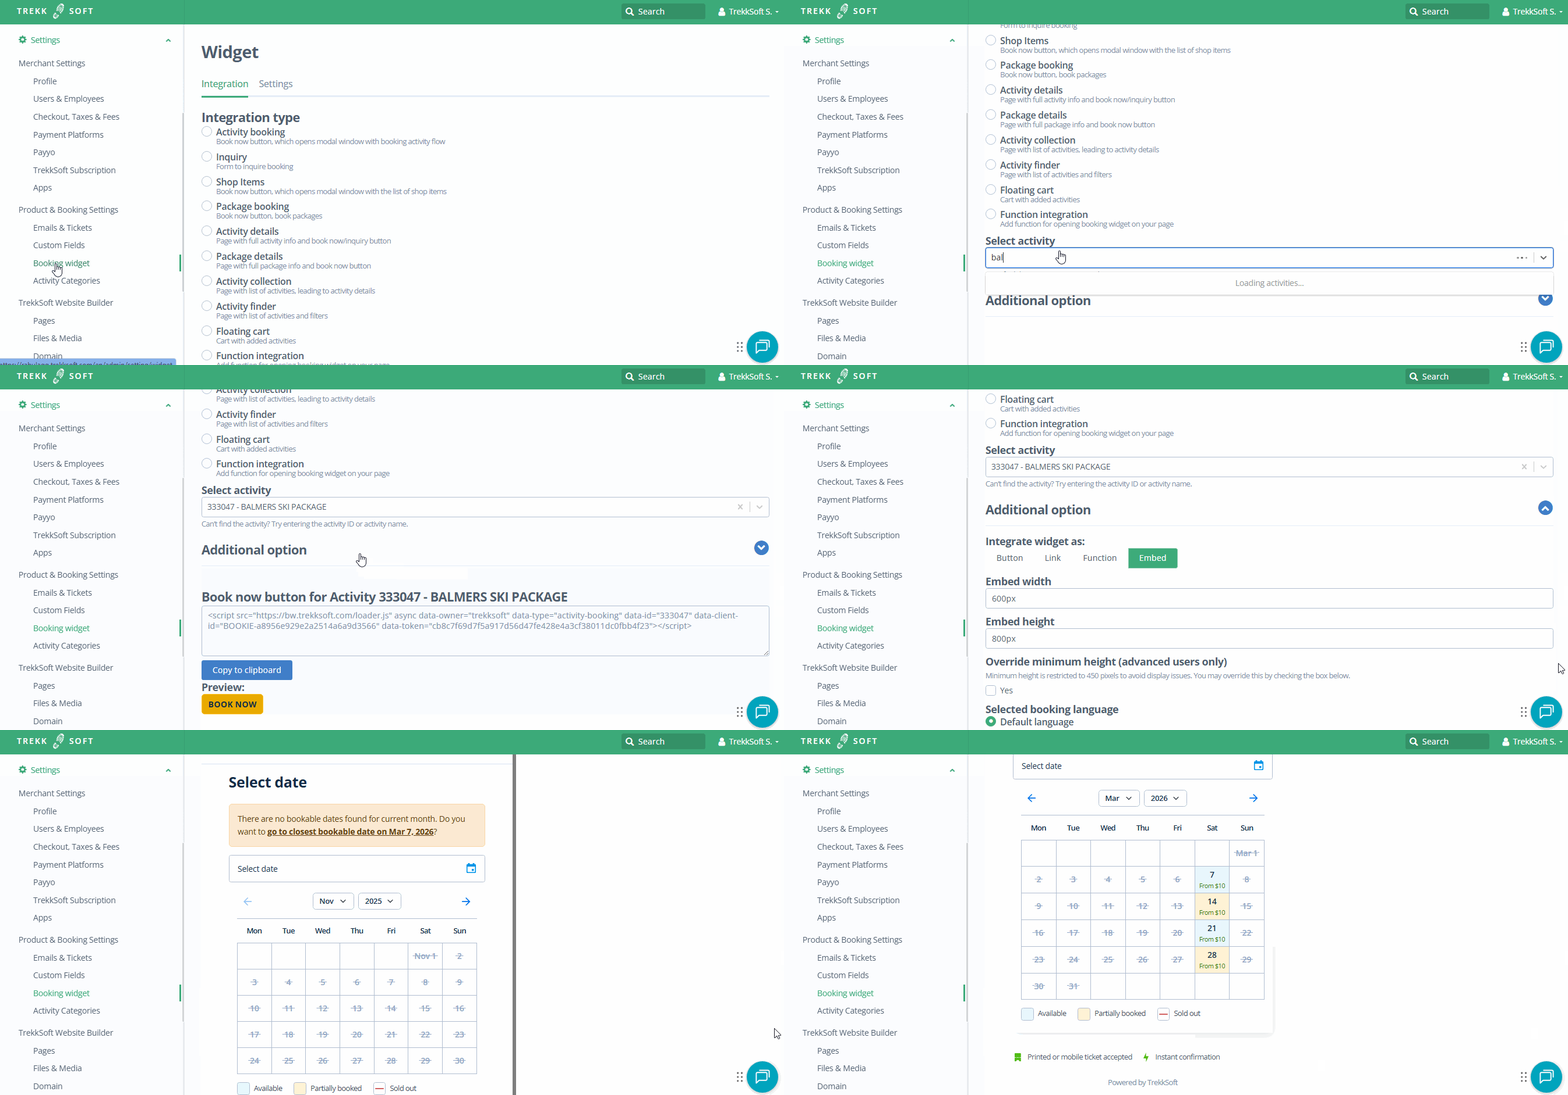
NOTE! Please keep in mind that the new booking widget won't support iFrame integration. We've compiled a couple of reasons why iFrame integration is less favorable on your website here.
Light & Dark Mode
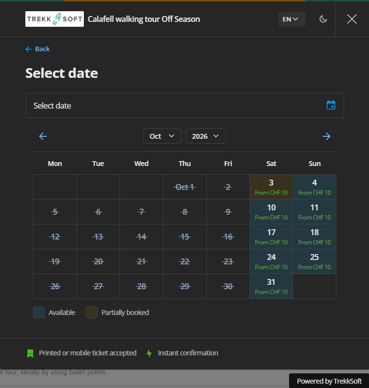
The Booking Widget now supports both Light Mode and Dark Mode, allowing you to decide how the widget is displayed to your visitors.
Why did we add this feature?
Many visitors browse the web using Dark Mode on their browser or operating system. Supporting their preferred color scheme improves readability, reduces eye strain, and helps websites meet modern accessibility recommendations. The Booking Widget now includes theme options to support these preferences while giving merchants flexibility over how the widget is displayed.
Configuring the Booking Widget Theme
The theme can be configured in your admindesk from:
Settings → Booking Widget → Integration → Additional options
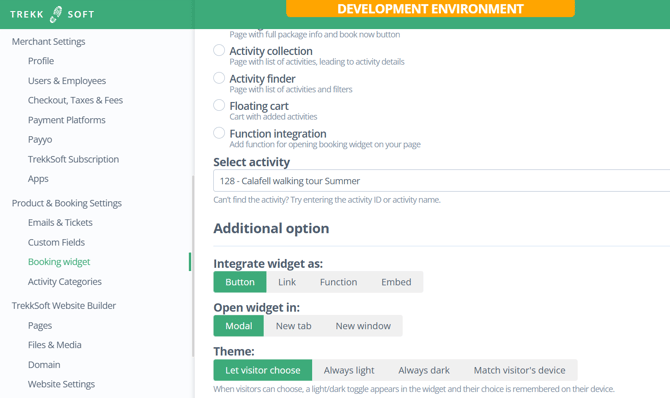
The Theme setting offers four different options.

1. Let visitor choose (Default)
This is the default option for all Booking Widgets.
When the Booking Widget opens:
- It initially matches the visitor's device preference (Light or Dark Mode).
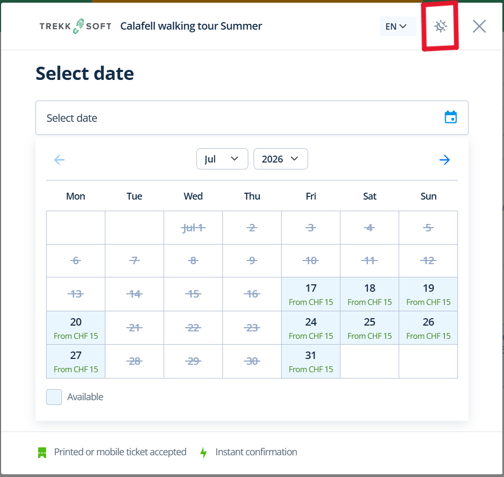
- A theme switcher appears in the Booking Widget.
- Visitors can switch between Light and Dark Mode whenever they want.
- Their preference is remembered on their device for future visits.
Accessibility compliance: ✅ Compliant
2. Always light
The Booking Widget is always displayed in Light Mode.
- Visitors cannot switch to Dark Mode.
- The theme switcher is not displayed.
This keeps the Booking Widget visually consistent with websites that only use a light theme.
Accessibility compliance: ❌ Not compliant
3. Always dark
The Booking Widget is always displayed in Dark Mode.
- Visitors cannot switch to Light Mode.
- The theme switcher is not displayed.
Accessibility compliance: ❌ Not compliant
4. Match visitor's device
The Booking Widget automatically follows the visitor's browser or operating system setting.
- Visitors using Light Mode will see the Light version.
- Visitors using Dark Mode will see the Dark version.
- The theme switcher is not displayed because the widget always follows the device preference.
Accessibility compliance: ✅ Compliant
Accessibility and Compliance
Supporting a visitor's preferred color scheme is an important accessibility improvement.
The Booking Widget is considered accessibility compliant when visitors can view it using their preferred theme.
The following options are compliant:
- ✅ Let visitor choose
- ✅ Match visitor's device
The following options are not compliant because they force a single color scheme:
- ❌ Always light
- ❌ Always dark
Which option should I choose?
For most merchants, we recommend Let visitor choose.
This option:
- requires no additional configuration,
- is enabled automatically for all existing Booking Widgets,
- follows the visitor's preferred theme by default,
- allows visitors to change the theme whenever they wish,
- provides the best accessibility experience.
If you prefer the Booking Widget to always follow the visitor's device without showing a selector, choose Match visitor's device.
Can I force a specific theme? Yes.
Some merchants may prefer their Booking Widget to always match the appearance of their website. For example, a website that only uses a light theme may prefer the Booking Widget to remain light as well.
You can do this by selecting Always light or Always dark.
While this is a valid branding decision, it removes the visitor's ability to choose their preferred color scheme and therefore does not meet accessibility recommendations.