Email Templates Explained
Email Templates provide you with the option to send emails to guests throughout the booking process, to send forgotten passwords for users and more...
Last Update: December 24, 2025
Here is an overview of what we cover in this article:
_______________________________________________________
Email Templates Explained
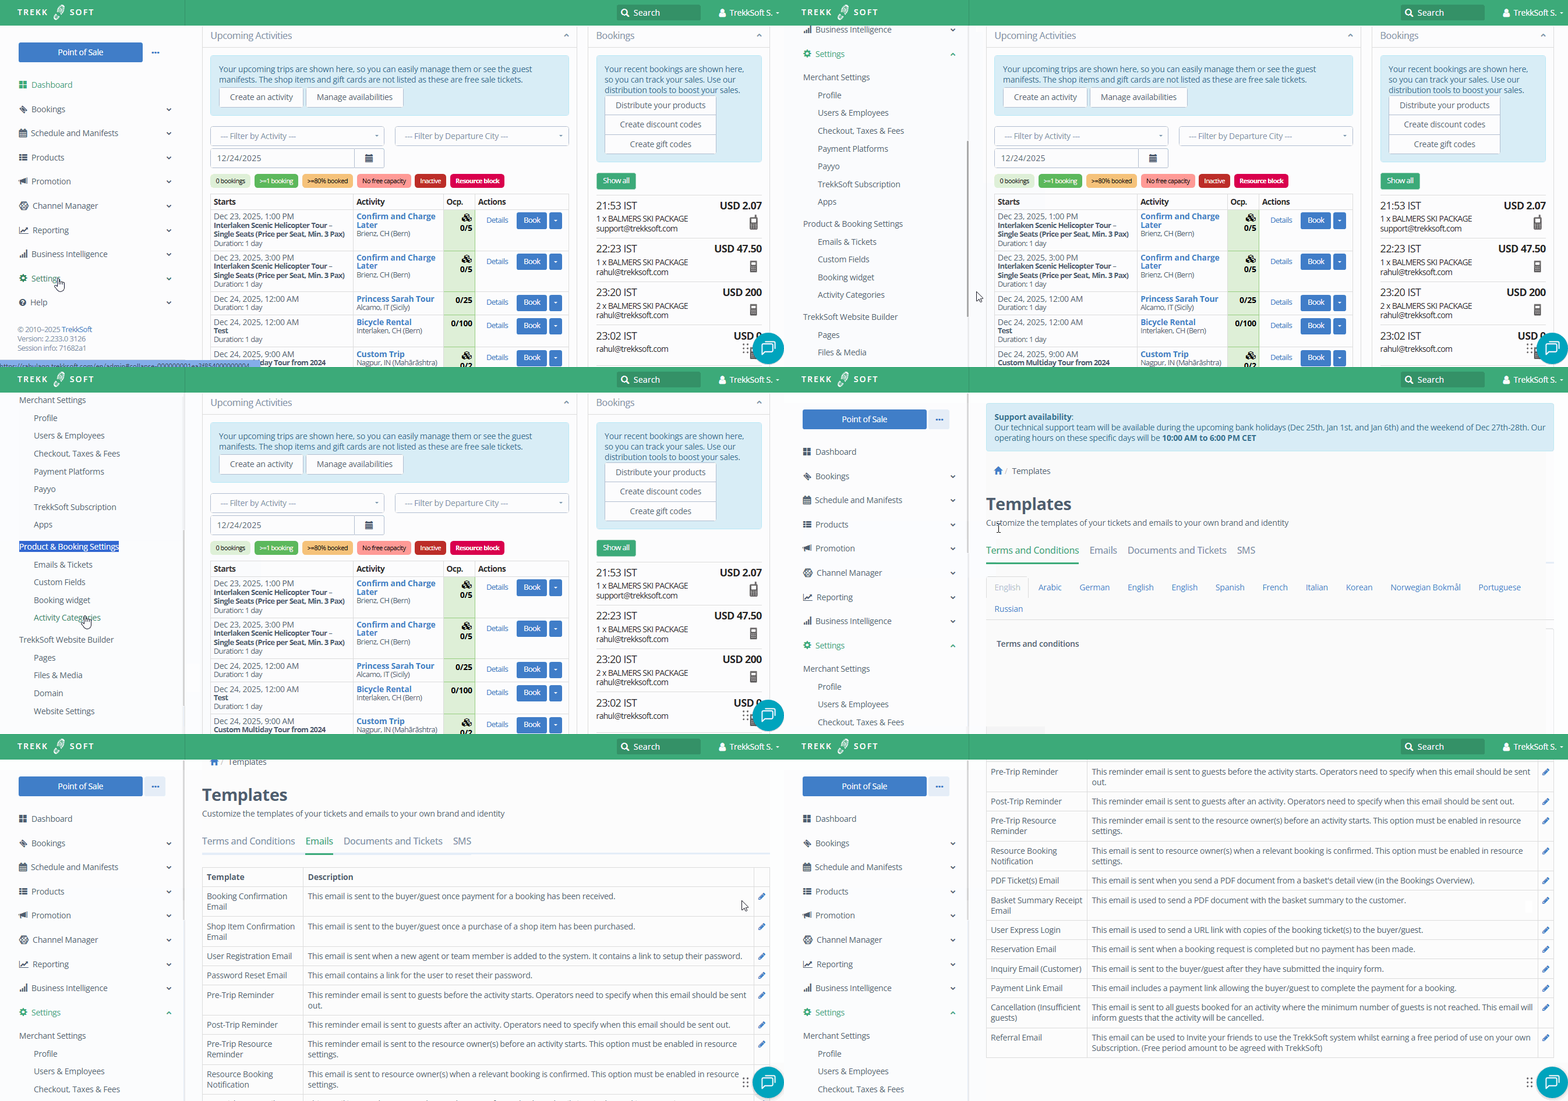
Email templates are available by following these steps (or watch the video below) :
- Log into your Admin Desk e.g. "yourcompany.trekksoft.com"
- Once you are logged in, on the left-hand side go to Settings> Product and Booking Settings> Emails & Tickets
- Now, at the top, click on the Emails tab

_______________________________________________________
You will see a full list of the available email templates. Each email template has different settings and content. This allows you to edit the emails to suit your business needs.
Below are links to documentation which provides you with a breakdown of how each email template can be used. Each row of the document contains a breakdown of the following information for each email template:
-
- The name of the email template
- A description of the email
- Is it a manual or automatic email?
- What triggers the email?
- Where can I find the options to use the email?
- Can the email be activated or deactivated?
- What attachments are included with the email that is sent?
- Any additional information
The full email templates list is available in PDF and Excel formats:
Click here to download the full list in .xlsx format
Click here to download the full list in .pdf format
_______________________________________________________
Customize An Email Template
All emails are pre-set with generic text. However, the text is fully customizable. Follow the instructions above to locate the email templates. Once in this section, choose the email you would like to edit by clicking on the pencil buton.
IMPORTANT ! The Sender Name & Email Address must be completed on any email template otherwise the template will not be used by the TrekkSoft system.
The Sender Name is the name of the person/company the email has been sent from. The Sender Email is used if a customer replies to an email automatically sent. It will need to be an active email address to receive and send a response.
We have pre-set place holders ready for you to copy and paste below your email text box. These will automatically personalize your email to each customer, for example, adding their name, date of travel, etc.
Once you have completed your changes click save.
_______________________________________________________
How to Combine Emails (PDF tickets & Basket Summary Receipt)
Instead of sending two emails, you can use the Combine Emails feature so the Basket Summary Receipt and the PDF ticket(s) are attached to the same email.
To activate this feature, follow these steps:
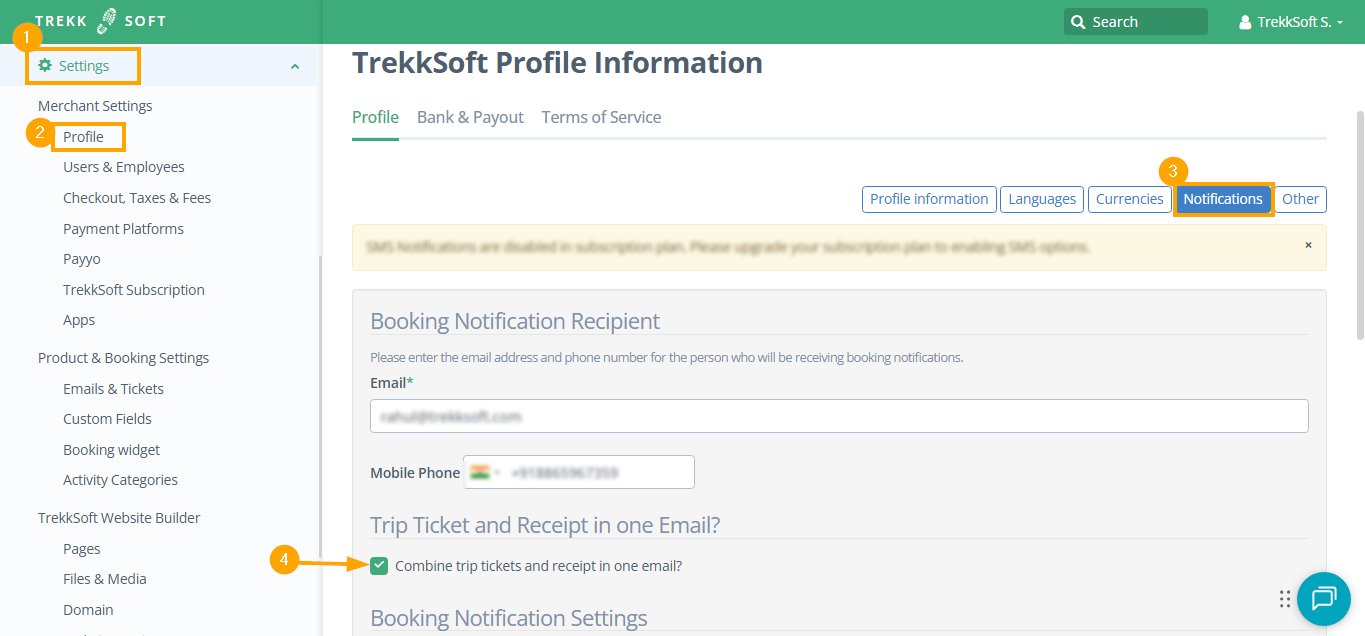
- In your Admin Desk, on the left-hand side go to Settings > Profile.
- On the right-hand side of the screen, click on the Notifications button.
- In the notifications screen, scroll down until you see the Combine Trip Ticket and Receipt in one Email?
- Tick the checkbox to enable the feature

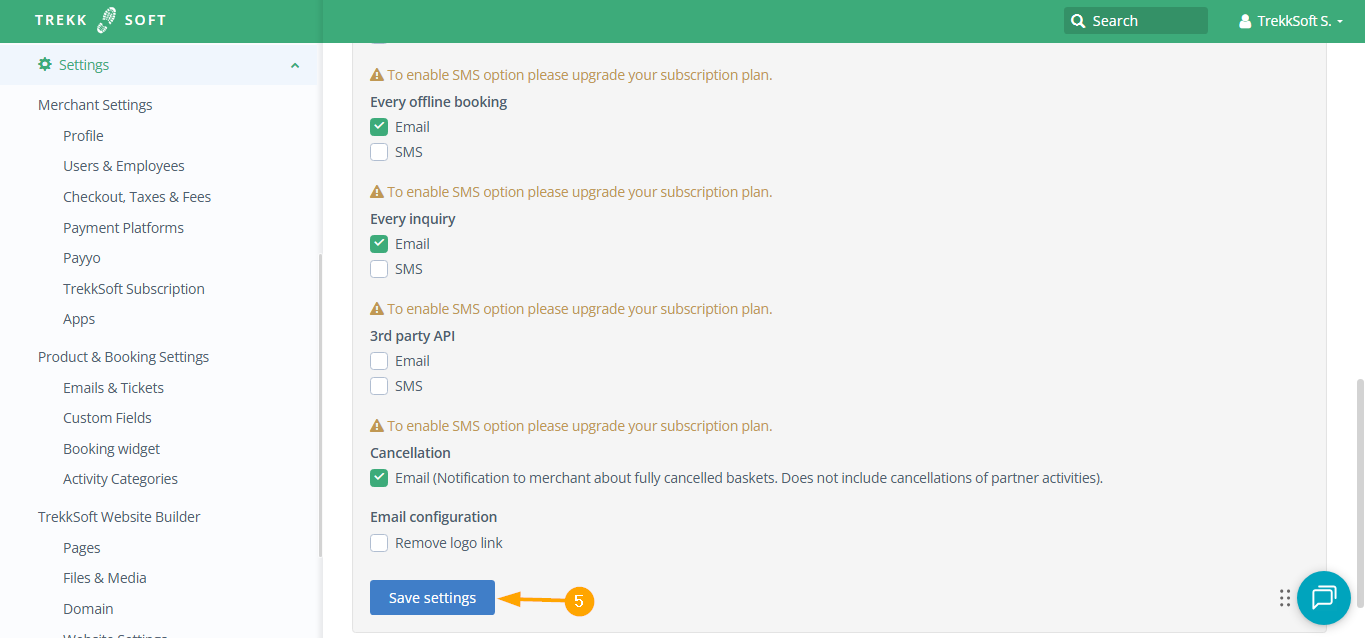
- Finally, click Save settings.

_______________________________________________________
Tips: Editing Emails
When editing the email templates, you can use placeholders. For example, if you would like to mention your customer’s name in the email, you can add {user.firstname} in place of the actual name of your customers.
For example, Say 'Bob' books a trip with you and in the confirmation email, you say:
-
- “Hey {user.firstname}, thanks for booking a trip with us!”
Bob will receive an email saying:
-
- “Hey Bob, thanks for booking a trip with us!”
We have a list of different placeholders for you to add to your emails to make them more personal and friendly. The available placeholders are listed at the bottom of each of the edit e-mail pages.