Last update [Jul 18, 2024]
Here's an overview of what we cover in this article:
________________________________________________________________________
Overview
Companies can create accounts for travel partners, sales agents, and resellers, giving them access to your availabilities, schedules, and prices in real-time.
Agents can also be given access to TrekkSoft's bookings tools such as the Booking Desk and the POS Desk to take bookings on your behalf.
________________________________________________________________________
Understanding Agents
With TrekkSoft, Agents are thought of as teams or entities, and each Agent can have multiple users associated with it. This is intended for tour operators who partner with other resale companies (with multiple employees) for example a hotel with more than one person working at the concierge.
Depending on your business arrangement with each reseller, you can customize permissions for Agents, controlling access to different parts of TrekkSoft.
If an Agent does not have an allocated user they won't have access to your booking tools and will need to provide their Agent Code at checkout on your website.
________________________________________________________________________
Creating an Agent
STEP 1: Add Agent
To create an Agent, go to Promotion > Agents & Resellers in the left menu. Then, click on Add Agent.

STEP 2: Complete Agent details and permissions
Create a unique code for your agent to track agent bookings. Make sure travelers enter the agent code under "discount code" at checkout.
Agent Code
Enter the Agent code that can be used during the booking process.

Commission
Indicate the commission, in percentage, you would like to pay this Agent. Commissions are calculated from the sale price.
You can change the Default Commission from a percentage of the final price to a fixed amount based on your account’s default currency. You can set the currency from Merchant Settings >
Currencies.

NOTE! Agent Commission is always computed before taxes & fees are included. It will always be applied to the price of the Activity.
For advanced users: To incentivize customers to use your code, you can also set up your Agent Code to work as a Discount Code. Make sure to check the box "Create a discount code with this agent code if none exists already" and enter a percentage to be discounted.

Additional Information
You can enter the bank details of the agent as a reminder of where their commission should be transferred to.

IMPORTANT! Please note that this doesn't mean that the agent will automatically be paid.
Permissions
When selecting Agent permissions, you can either select a pre-selected set of permissions or customize permissions to suit your business arrangements. Simply check all that apply.
Learn more about agent permissions in the following section.

STEP 3: Assign users
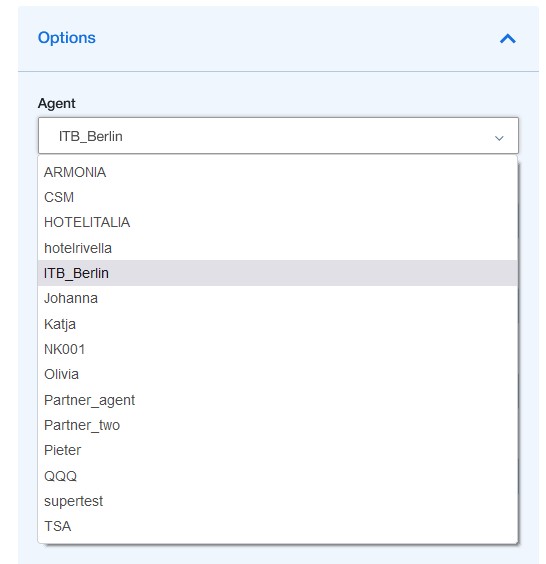
After creating an Agent, go to Assign users and search for users to allocate by typing their name into the search box.

If you're unsure on how to create users that can log in to your website, please refer to our Support page here Learn how to create Users here >>
________________________________________________________________________
Agent Permissions

The following list will explain all permissions you can give to your agents:
IMPORTANT! Please keep in mind that when changes are made to the agent’s permission, that they have to log in and out, before these take effect.
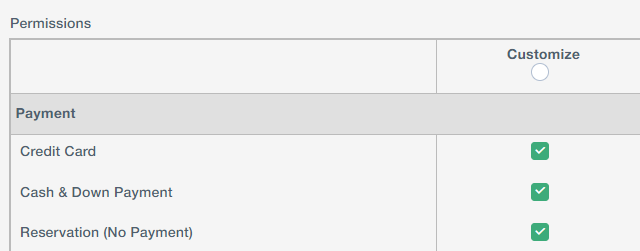
Payment
- Credit Card: If enabled, the agent can take payments by credit card using Payyo's Hosted Payment Page (or a third party payment gateway). If disabled, you can’t take payment:

- Cash & Down Payment: The agent is allowed to accept cash payments for bookings, or only accept a down payment instead of the full price if a down payment is a setup. If enabled you can “Book as Paid”.
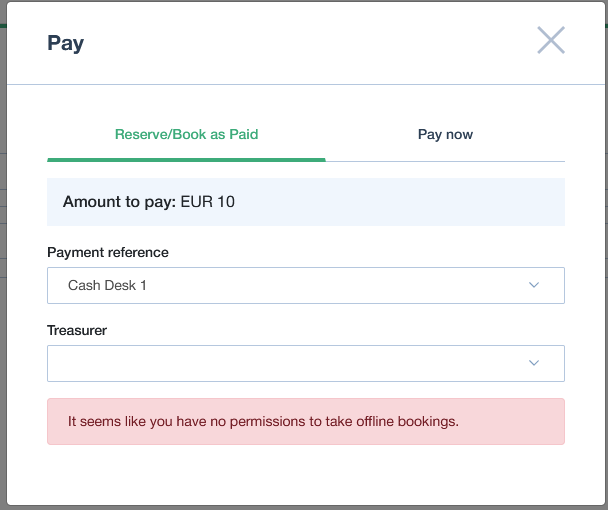
- Reservation (No Payment): The agent is allowed to make reservations where no payment is needed at the time of booking.
- If enabled, you can “Reserve without payment”
- If disabled, you can’t take offline bookings (reservations) without payment:
- If enabled, you can “Reserve without payment”
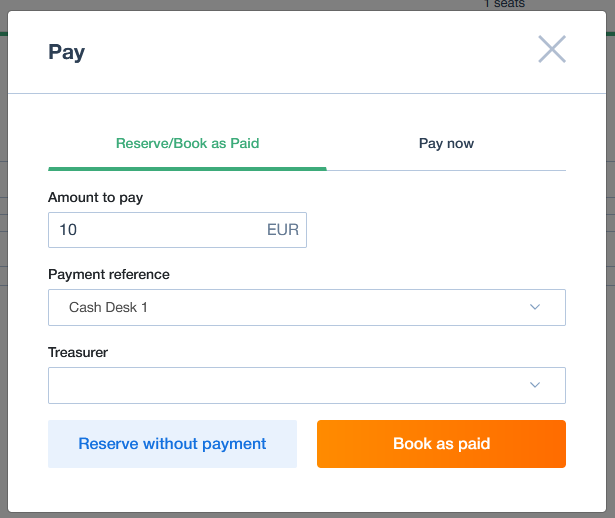
- Add (manual) payments: Whenever one of the 3 payment permissions in the Payment section is enabled, agent will be able to add payments to the basket.
Pricing
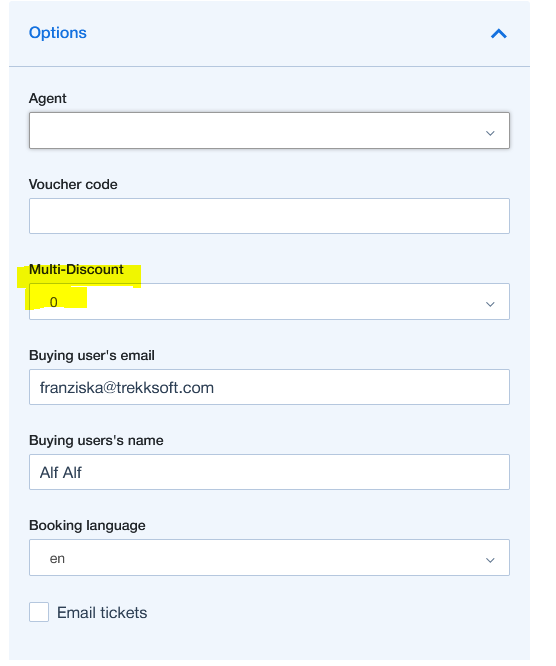
- Adjust Prices & Multi-discounts: The agent is allowed to change the total price of the basket or apply a multi-discount to items in the basket.
- Adjust Prices:
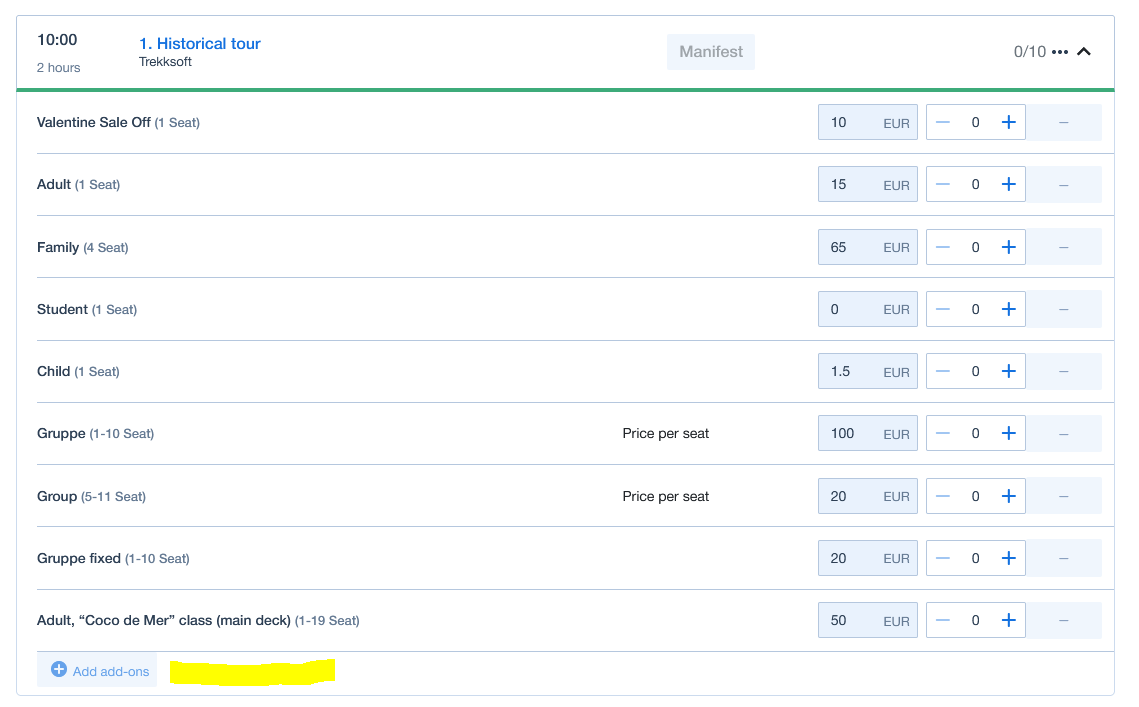
- If enabled, you can change the given price by clicking in the price category price. And you can create custom price categories:
- If disabled, you cannot change the given prices of the price categories, nor you do have the option to use custom price category.
- If enabled, you can change the given price by clicking in the price category price. And you can create custom price categories:
- Multi Discounts:
- If enabled, you are allowed to change the multi discount in the checkout process:
- If disabled, the multi discount field is disabled in the checkout process.
- If enabled, you are allowed to change the multi discount in the checkout process:
- Adjust Prices:
- Offer Custom Trips: The agent can create custom departures times for activities.
- If enabled, custom trip option is showing up in the trip’s drop down:
- If disabled, custom trip option is not appearing in the drop down of the trip:
- If enabled, custom trip option is showing up in the trip’s drop down:


Booking & Basket details
- Change Treasurer: The agent can assign someone else to be the recipient of payments.
- If enabled, you can change the agent that receives the money in the checkout process:
- If disabled, this is not selectable, but by default the agent you logged in with.
- If enabled, you can change the agent that receives the money in the checkout process:
- Change Buying User: This allows agents to change the buying user to someone else other than the user that's logged in.
- If this is enabled you have the option to change the buying user in the booking details:
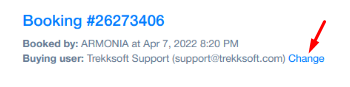
- If this is disabled, this field is disabled and you won't be able to change buying user in the basket details:
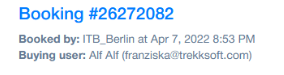
- If this is enabled you have the option to change the buying user in the booking details:
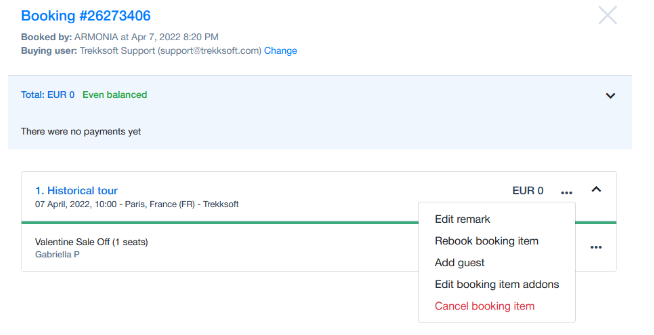
- Add & Modify Basket Items: If this is enabled, the agent can edit (add/edit guest, add/edit add-ons, edit remarks) or rebook booking items/guests. If this disabled, then these options are hidden.
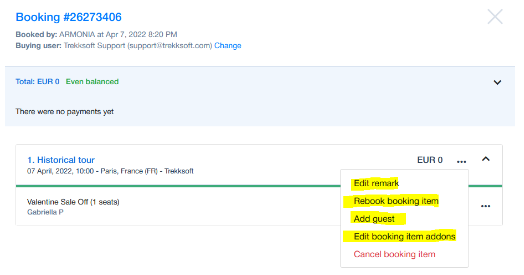
- Cancel Bookings: This allows to cancel booking items, baskets or cancel guests. If this is disabled, the cancel option on booking item and guest level is hidden as well as the button “cancel booking” on the left bottom side:


Capacity
- Overbook a Trip: Allow the agent to book more seats than what is defined in the schedule. If this permission is active, you can book a trip even if it extends the trip’s availability. If this permission is disabled, when trying to overbook, you see the following message.
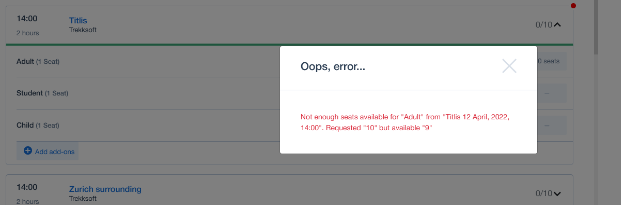
Note: Please keep in mind that on the partner network level there is also an overbooking permission. This one will always be prioritized, even if the agent has no overbooking rights.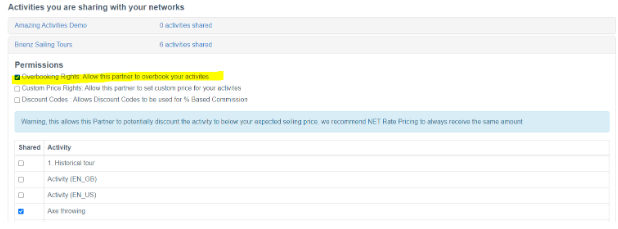
- Change capacity: If enabled, you can change the trip’s capacity and therefore this drop down menu point appears.

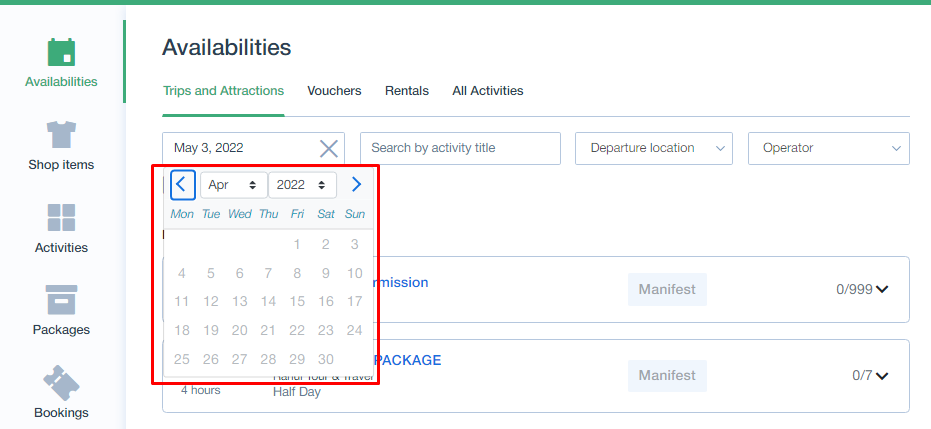
- Book Past Trips: Allow the agent to book trips after their starting time. If this is enabled, you can go to the past and book trips. If you don’t have this permission enabled, you won't be able to select the past dates in the calendar:
Operations
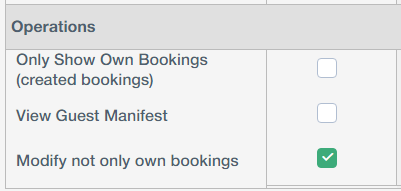
- Only show own bookings: Only allow the agent to view bookings they've made.
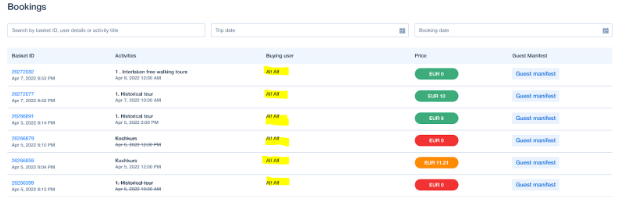
- Also when accessing the guest manifest, you’ll only see your own bookings. Also the export will only show your own bookings, but you will see the booked number of guests at the top.
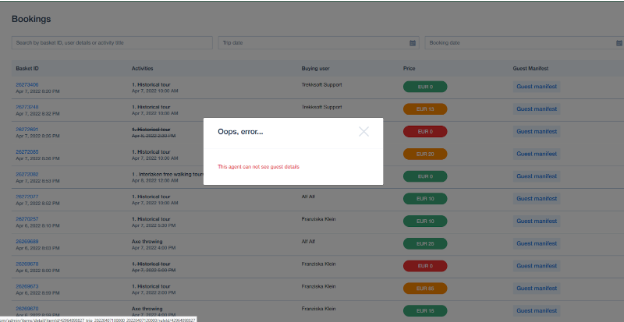
- Note: Keep in mind that you are not allowed to see partner’s booking (partner network) due to GDPR reasons. The following message will appear in the guest manifest:
- Also the guest manifest export only shows the guests you’re allowed to see. However, you see the number of booked guests.
- Scan tickets via mobile app (mPOS): When the "Only Show Own Bookings (Created Bookings)" permission is enabled, the agent will see a message that reads, "You have no permission to scan this ticket as the booking was created by another agent".
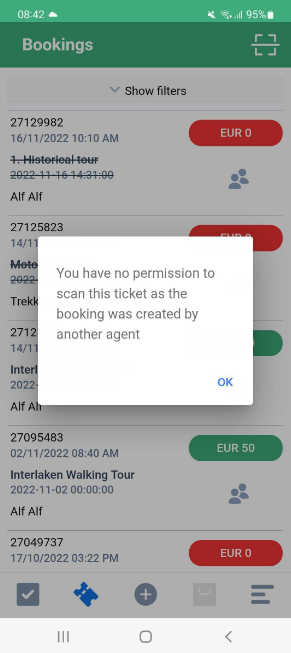
- Make sure to enable permission "Modify not only own bookings" if agent is authorized to scan all the tickets i.e. bookings from another agents as well.
- Also when accessing the guest manifest, you’ll only see your own bookings. Also the export will only show your own bookings, but you will see the booked number of guests at the top.
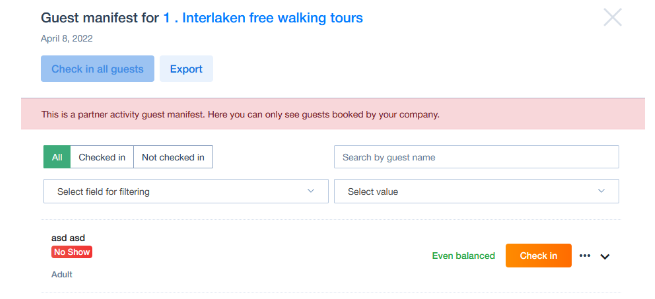
- View Guest Manifest: This allows the agent to access the guest manifest of the activities.
- If enabled, it gives access to the guest manifest (from availability & booking list and booking details). If disabled, then access to the guest manifest from booking list is prevented:
-
Guest manifest option in booking details is hidden:
- People icon in the availability list is hidden.
- If enabled, it gives access to the guest manifest (from availability & booking list and booking details). If disabled, then access to the guest manifest from booking list is prevented:
________________________________________________________________________
Agent commission and reports
When you Navigate to Reports > Accounting > Agents you will find the Turnover and Commission to be paid to each agent.
To find the custom commission for each activity, go to Details next to the Agent, then Details next to each month.
Agents can access their commission reports to track their own performance.