- Help Center
- Manage
- Set up social media profiles
-
Getting Started
-
Sell
-
Manage
-
Grow
-
FAQs
-
Documentación en Español
- Add-ons
- Integración avanzada de Facebook
- Hacer rebooking, cancelar y reembolsar reservas
- Visualización de los Detalles en la Canasta y Ajustando el Balance de las Cuentas
- Consiga toda la información sobre sus clientes con los Campos personalizados
- Gestiona tus agentes
- Colores, Fuentes, Logos y Temas
- Customiza tus emails
- Customiza tus Términos y condiciones
- Customiza tus mensajes de texto
- Integración básica de Facebook
- Reglas de Programación - Vale
- Crear páginas
- Orden de Páginas y Navegación del Menú
- Crear actividades
- Customiza tus entradas en PDF
- Genera un botón de reserva para tu página web oficial
- ExperienceBank
- Visualizar y Gestionar su Programación de Actividades
- Agregar Categorías de Precios
- Usa tu propio dominio con TrekkSoft
- Códigos de descuento y tarjetas regalo
- Crear Reglas para Programas
- Artículos de tienda
-
Deutsche Dokumentation
- Expedia Integration
- Checkout, Steuern und Gebühren
- Rückerstattungen und Gutschriften an Kunden
- Ertrags-Management
- Informationen von Ihren Gästen abrufen - Benutzerdefinierte Felder
- Farben, Schriftarten, Logos und Designs
- Aktivitäten erstellen
- Aktivitäten-Add-Ons
- Rabattcodes und Geschenkkarten
- Passen Sie Ihre SMS an
- Aktivitätenkategorien
- Konfigurieren Sie PDF-Tickets
- Mit der Musement-Plattform verbinden
- Konfigurieren Sie Emails
- Zahlungslinks
- Seitenreihenfolge und Navigationsmenü
- Konfigurieren Sie Ihre AGB
- Preise zu Touren und Aktivitäten hinzufügen
- Zeitpläne erstellen
- Auszahlungsmethoden
- Partnerschaften und Reselling
- Agenten
- Anfragen und Private Touren erstellen
- Anzeigen und Verwalten von Zeitplänen
- Zeitpläne für Verleih
- Detailansicht Warenkorb / Kontoguthaben
- ExperienceBank
- Anzahlungen
- "Jetzt buchen!" Buttons für externe Website erstellen
- Shop-Artikel
- Kalender Synchronisation Für Google Kalender und andere
-
Documentazione in Italiano
- Connetti a Esperienze TripAdvisor (precedentemente noto come Viator)
- Crea tu perfil
- Personalizza i tuoi termini e condizioni
- Commissioni per Agenti e Partner e Tassi netti
- Partnership e rivendita
- Campi personalizzati
- Creare regole di programma
- Categoria di prezzo esclusiva/privata
- Sincronizzazione calendario per Google Calendar e altri
- Gestione del rendimento
- Gestisci le disponibilità di posti in base alle risorse di inventario
- Crea una Pagina
- Attività
- Dettagli carrello - Link di pagamento
- Creare richieste e tour privati/personalizzati
- Colori, Caratteri, Logo e Temi
- Menù di navigazione
- Aggiungere categorie di prezzo
- Voucher
- Acquista articoli ed estensioni attività
- Cancellare e rimborsare un cliente
- Creare Attività
- Funzionalità notifica SMS
- Visualizzare e gestire i tuoi programmi di attività
- Musement & TrekkSoft
- Noleggio
- Agenti e diritti utente
- Codici sconto e Buoni regalo
- Personalizza i tuoi biglietti PDF
- L’integrazione di Expedia
-
Product updates
Advanced Facebook Integration
Connect with customers using Facebook Advanced options like, Facebook connect, Facebook Ads, etc.
Last update [Nov 11, 2022]
TrekkSoft's Facebook Integration allows you to connect with your customers via Facebook.
There are a number of options available to you once you have set up the integration, but first, you must set up your Facebook company account correctly.
Enabling your Facebook Company Account
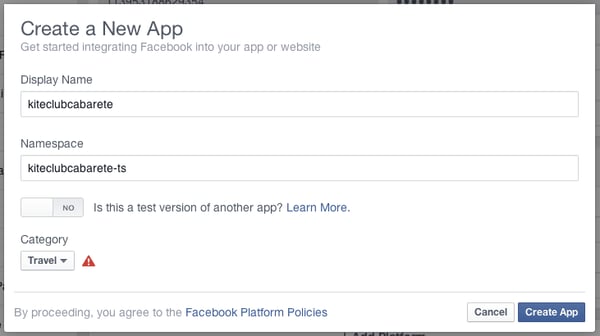
After signing up for a Facebook company account, click App > Create New App. This will take you to the first step of setting up your app:
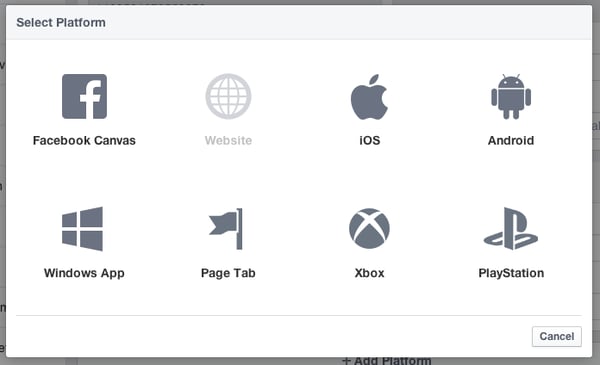
After entering the basic information about your company, click Create App. Next, you will be asked which platform it will be displayed on. Select Website.
In the last step of the process, you will be able to fill out the specifics of your integration:


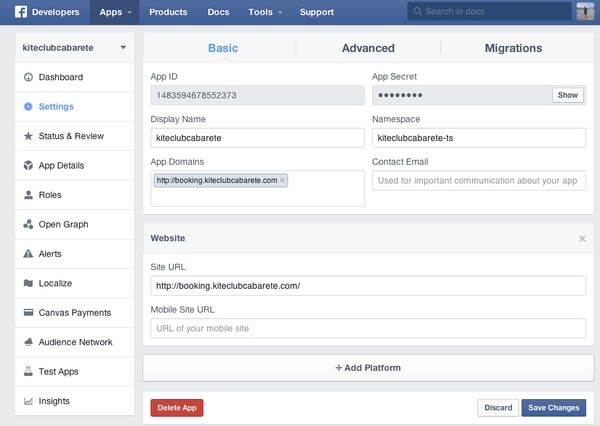
Once you are finished filling out this information, you can click Save Changes, but be sure to keep this information available for when you set up your TrekkSoft account with Facebook.
________________________________________________________________________
Completing your Integration with TrekkSoft
Once you have completed the above steps, return to your TrekkSoft account and go to Settings > Merchant Settings and select Apps from the drop-down menu. On the Apps page, search for “Facebook” and click on the Configure button.
Be sure to fill out the URL path as it is shown below. Then insert the API key and the Secret Key.
Facebook Like Button - Allow customers to spread the word about the great experience they had with your business. A "Like" button will appear on each one of your activities, so customers can show their support with only one click.
Facebook Connect - Facebook Connect allows your customers to sign in by clicking "Login With Facebook". This means that users can log in to their accounts with only a few clicks, allowing them to make purchases even faster.
After you have customized your integration, click Save and you are ready to go!