Last update [June 4, 2022]
In this guide, we'll cover:
- Overview
- Setup a New Agent
- Setup Custom Commissions
- Custom Commissions Overview
- Sharing Activities with your Agents
- Agent Upload
- Basket Details and Agent Commissions
- Agent and Commission Reports
________________________________________________________________________
NOTE: This feature is now available for all subscription fee plans. You can use this feature if you pay any sort of recurring subscription fee. If you do not, and would like to add it to your price plan please contact your Account Manager.
This feature is designed for operators who work with multiple agents receiving different commissions for different activities.
From Promotion > Agents & Resellers, you will find a grid outlining the name of the agent, their commission range (the lowest and highest commission they receive for selling your products), their discount and user allocations.
________________________________________________________________________
Setup a New Agent (With Custom Commissions)
STEP 1: Add an agent
To setup a new agent, click on Add Agent to the right. Here, you can set a Default Commission in the Commission field which will apply to all products.
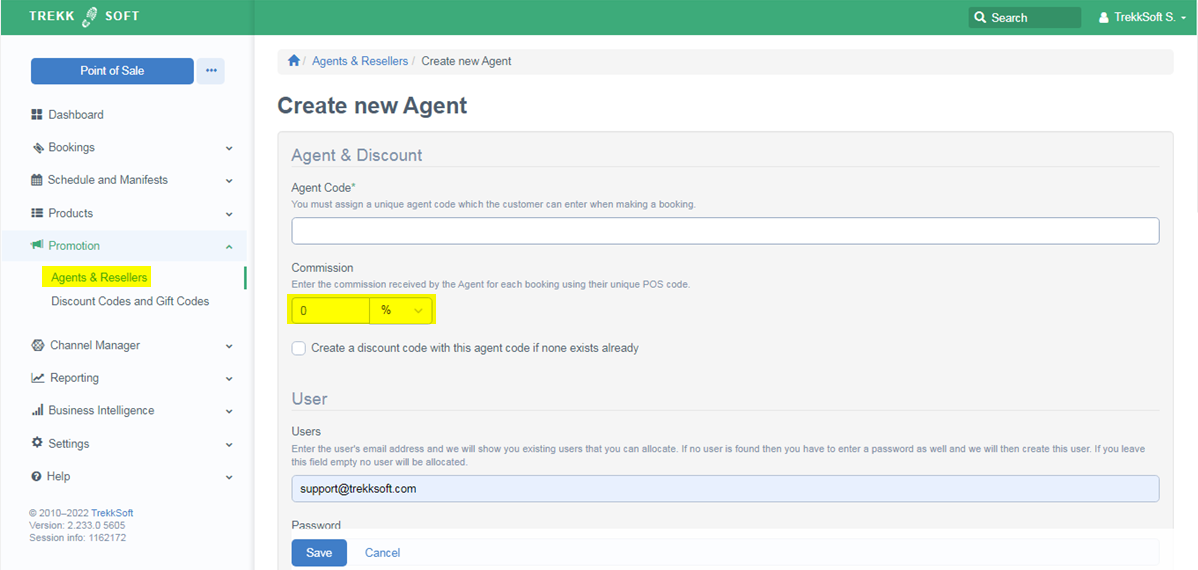
STEP 2: Select the Commission Type
You can change the Default Commission from a percentage of the final price to a fixed amount based on your account’s default currency. You can set the currency from Merchant Settings > Currencies.
Note: To set up custom commissions for existing Agents, go to Edit Agent and follow the steps below.
________________________________________________________________________
Setup Custom Commissions
To setup Custom Commissions for each product for each agent, first save the new agent and return to the Agent overview page.
STEP 1: Edit
Select Actions > Edit next to your agent and select the Custom Commissions tab.
Here you will see the Default Commission saved when you first created the agent. This can be changed again under the Edit agent tab.
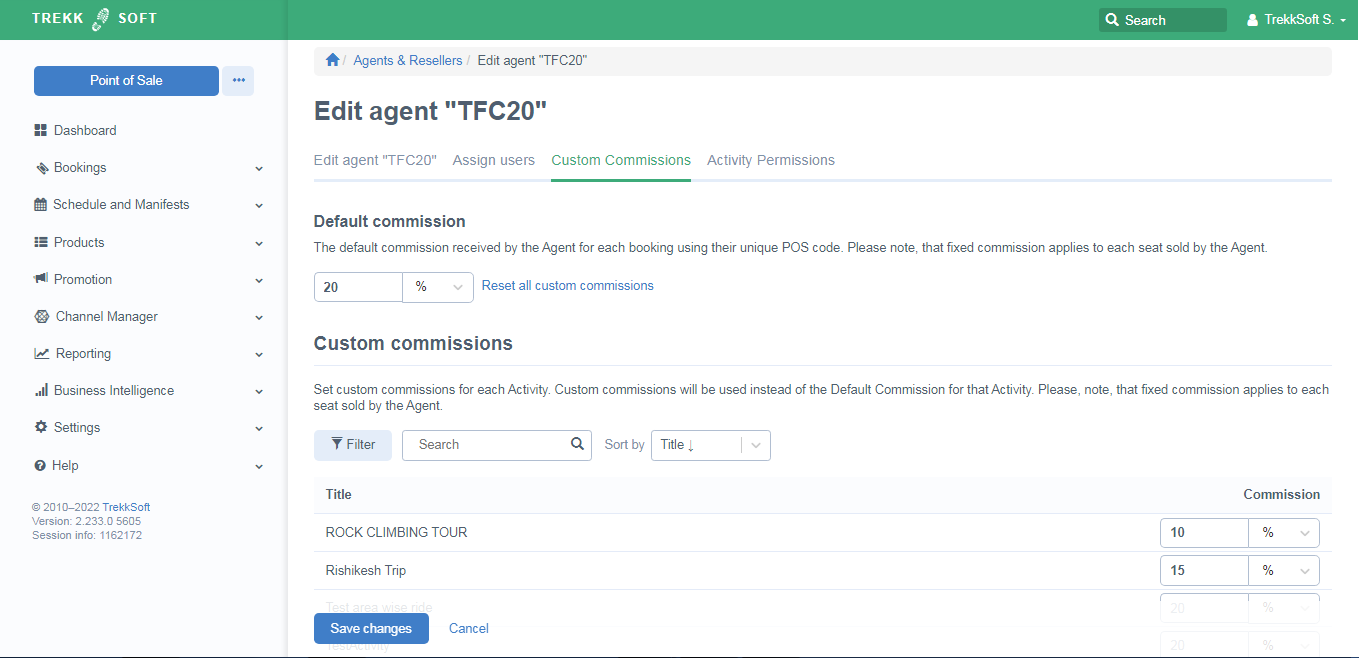
STEP 2: Enter your custom commission
Enter a custom commission for each activity. The custom commissions added here will override and take preference over the Default Commission.
Next to each activity, the commission can be changed from a percentage to a set value in the default currency of your account. Select the drop down next to the % icon to change the commission type.
STEP 3: Hit Save Changes
![]()
________________________________________________________________________
Custom Commissions Overview
To view all Commissions for all Agents and Activities, navigate to Promotion > Agents & Resellers, then to the Custom Commissions tab.
Here you will see a grid with each of your products listed Vertically in the first column and each of your agents listed horizontally in the top row.
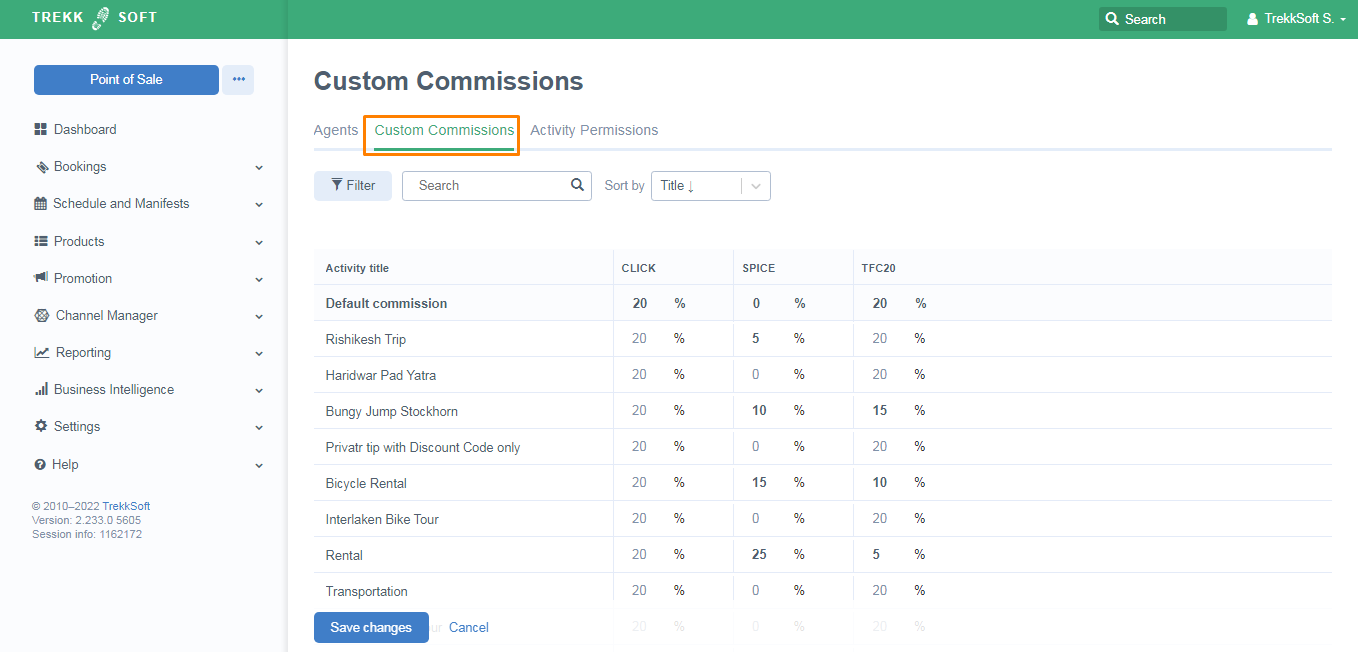
In each cell, you can update the Commission for each Agent and Activity. The % can be selected and changed to a Set Value (in default currency) instead of a percentage.
The custom commissions added here will override and take preference over the Default Commission entered in the Add Agent menu above.
________________________________________________________________________
Sharing Activities with your Agents
________________________________________________________________________
Agent Upload
Instead of setting up your agents one by one, you can upload your agents in bulk.
STEP 1: Set up your CSV file
Using the format of the downloadable Example CSV (you can view this under Import Agents), you can add new agents with custom commissions for each activity or add new custom commissions for existing agents.
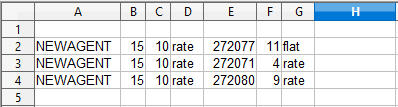
Columns A to D are for adding a new agent, Columns E to G are for custom commissions per activity:
- Column A: Agent Code
- Column B: Commission
- Column C: Discount code (optional)
- Column D: Commission type (rate or flat). It is set to rate by default. (optional)
- Column E: Activity ID for commission (optional)
- Column F: Custom Commission value (optional)
- Column G: Commission Type (rate or flat). It is set to rate by default. (optional)
Note: that the first row of the CSV is a header and will not be uploaded.
To add custom commissions, simply copy the Agent Code, Commission, Discount and Commission type for every row you wish to add a new custom commission to.
Retrieving your Activity ID
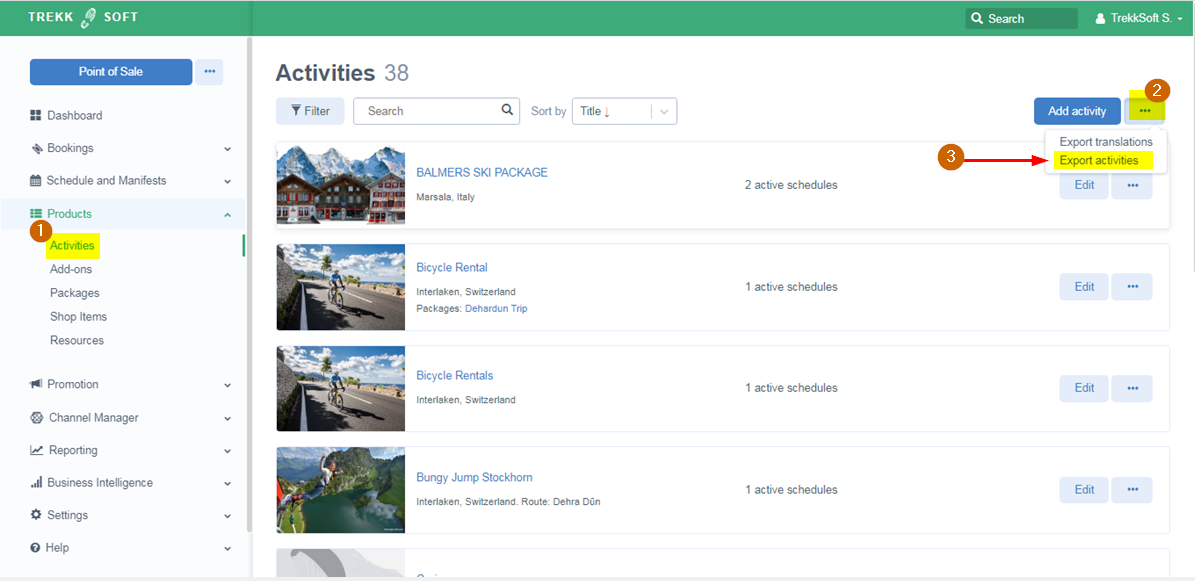
In Column E add the Activity ID you wish to add the custom commission for. This ID can be located by navigating:
- Products > Activities to find your own activities created in your account:
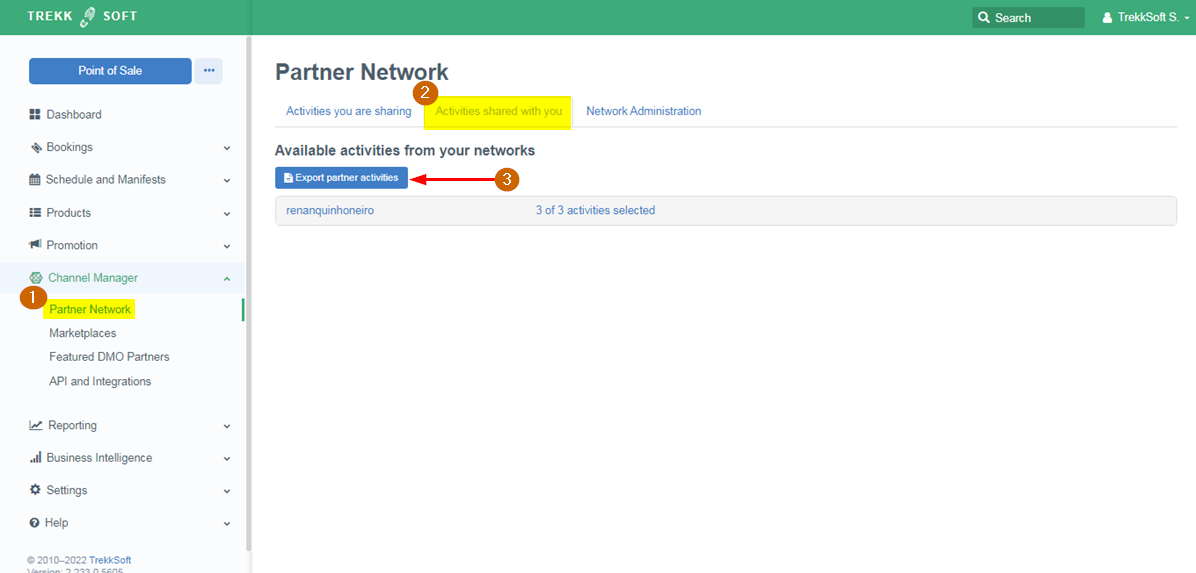
- Channel Manager > Partner Network > Activities shared with you to find partner activities:
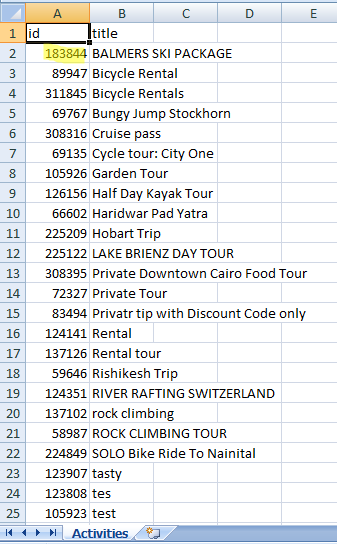
Example of exported file with activity Ids:
Rate or flat
In Column G specify whether the commission is a percentage amount (rate) or a fixed amount (flat).
Once your file is in order, save it.
STEP 2: Go to Import Agents
To upload new Agent Custom Commissions, navigate to Promotion > Agents & Resellers > Import Agents. Select the file you would like to upload.
STEP 3: Review your uploaded agents
On the next page you will be presented with preview before saving. Below Agent Permissions is a preview of all the new values you just uploaded.
Here you can review it matches your new commissions, or make any needed changes.
STEP 4: Hit save to apply
________________________________________________________________________
Basket details and agent commissions
When you receive a new Booking, you can find the Agent Commissions for this Basket under Bookings > Overview > Details > Agent.
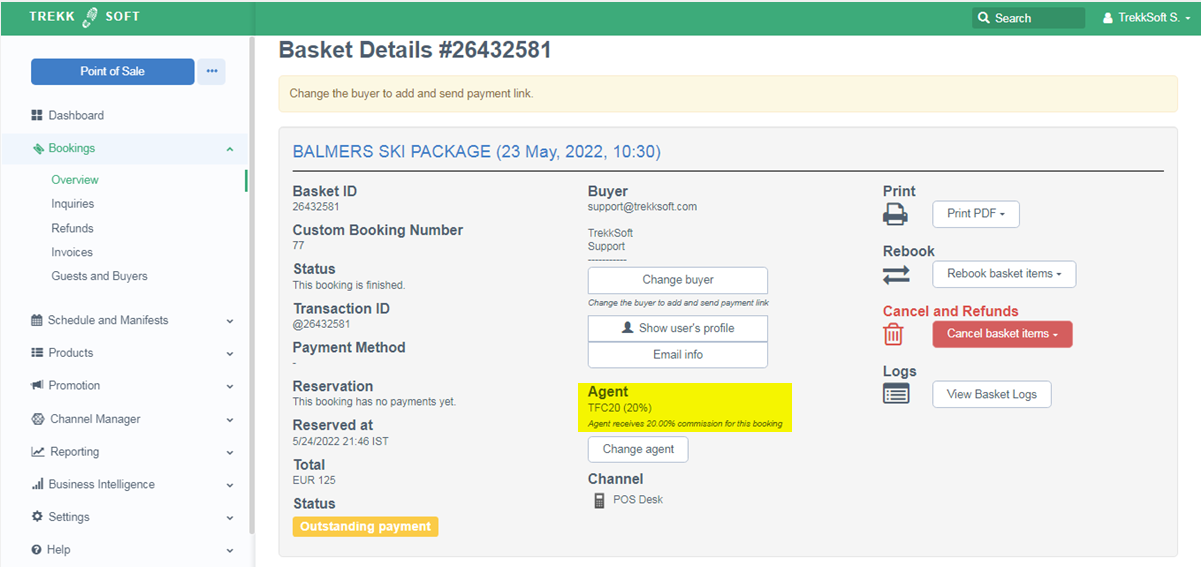
The commissions will be displayed here as a range (from the lowest to the highest commission they receive for selling your products).
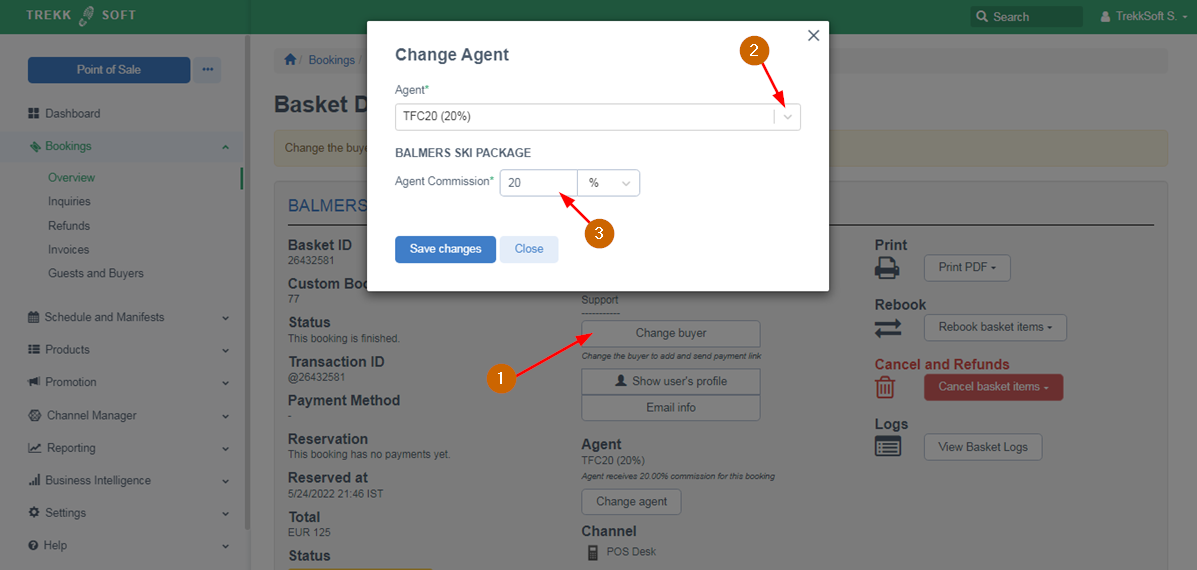
If you select Change Agent, you can change the Agent and the Custom Commissions for each Activity from the Basket.
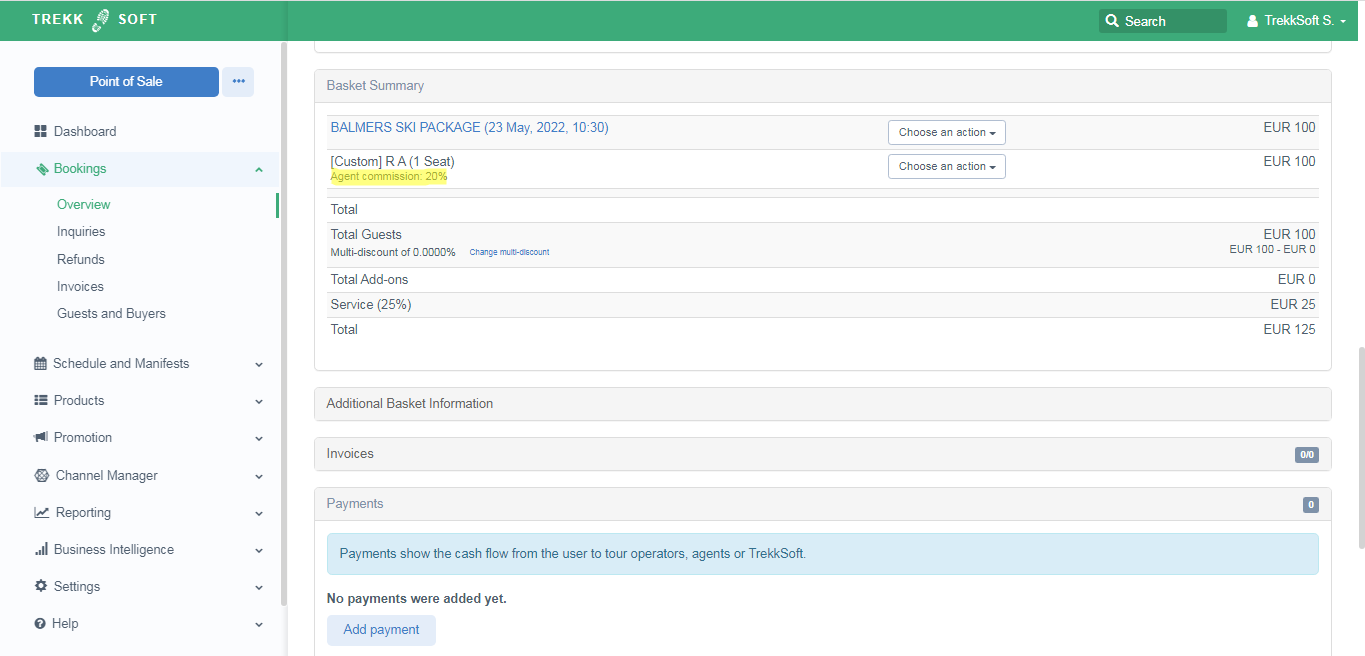
Under Basket Summary you will see each Activity in this Basket and the associated Agent Commission.
![]()
________________________________________________________________________
Agent and Commission Reports
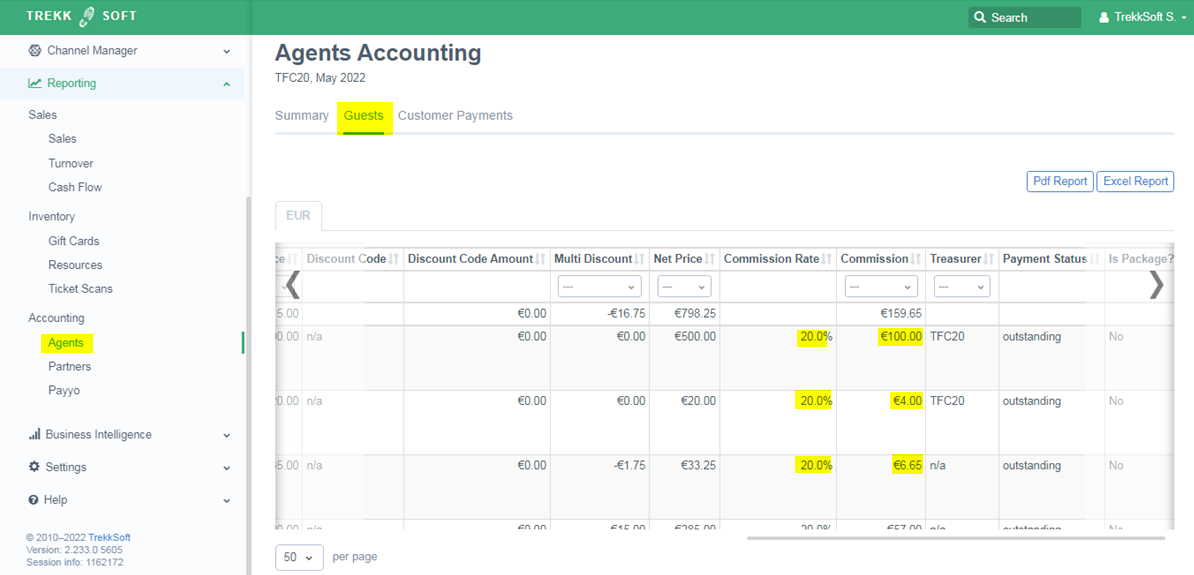
When you Navigate to Reports > Accounting > Agents you will find the Turnover and Commission to be paid to each agent.
To find the custom commission for each activity, go to Details next to the Agent, then Details next to each month.
Then click on the Guests tab to see each custom commission under column Commission Rate applied per Activity for that Agent.