Contents of this article include:
- What is a support ticket portal?
- How do I access the ticket portal?
- How to use ticket portal?
- When should I escalate a ticket and how can I do it?
What is a support ticket portal?
A support ticket portal is a home behind a login where our customers can view, open, reply and escalate their support tickets.
In the ticket portal, you can easily view all the tickets that you or your organization have opened. This includes all the communication that has been sent regarding the ticket, as well as the current status of the ticket.
How do I access the ticket portal?
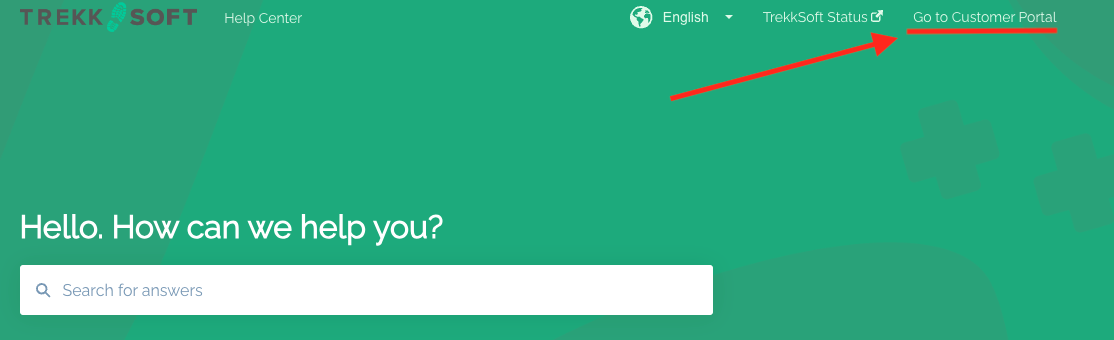
You can access the ticket portal trough our help pages by navigating to the ticket portal. Alternatively, you can directly reach it on the link here.
NOTE
It is important that before accessing the portal, you must create an account and then sign in. This ensures the security of your information and allows you to view and manage your support tickets efficiently.
How to sign in to an account?
In order to access the customer portal, you will need to sign in to your account. If you haven't signed in yet, a sign-in form will appear when you try to reach the ticket portal.
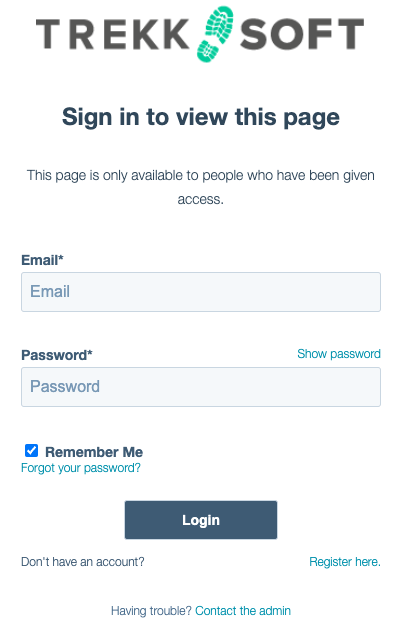
To sign in, simply use the email address and password that you provided when creating your account.
In order to see all your open tickets as well as your organisation tickets you should always be using the same email account with the domain of your organisation.
How to create an account?
If you haven't created an account to access the ticket portal yet, it's easy to do so. Simply click on the "Register here" button, which can be found on the sign in form (as shown in the screenshot above in sign in section).
Once you click on the "Register here" button, a new window will appear prompting you to enter your email and create a password. This email and password will be used for signing in to the portal in the future.
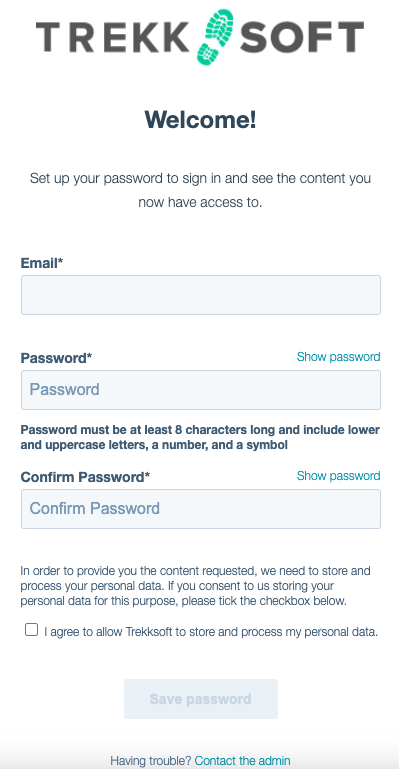
After clicking on "Save password," you will receive an email that requires you to confirm and activate your account.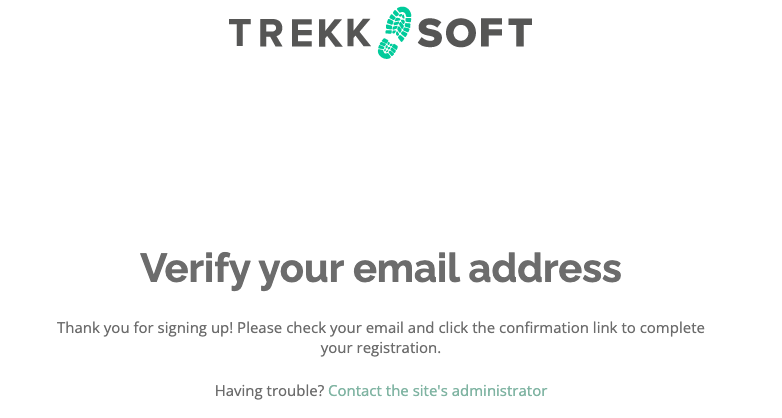
How to use ticket portal?
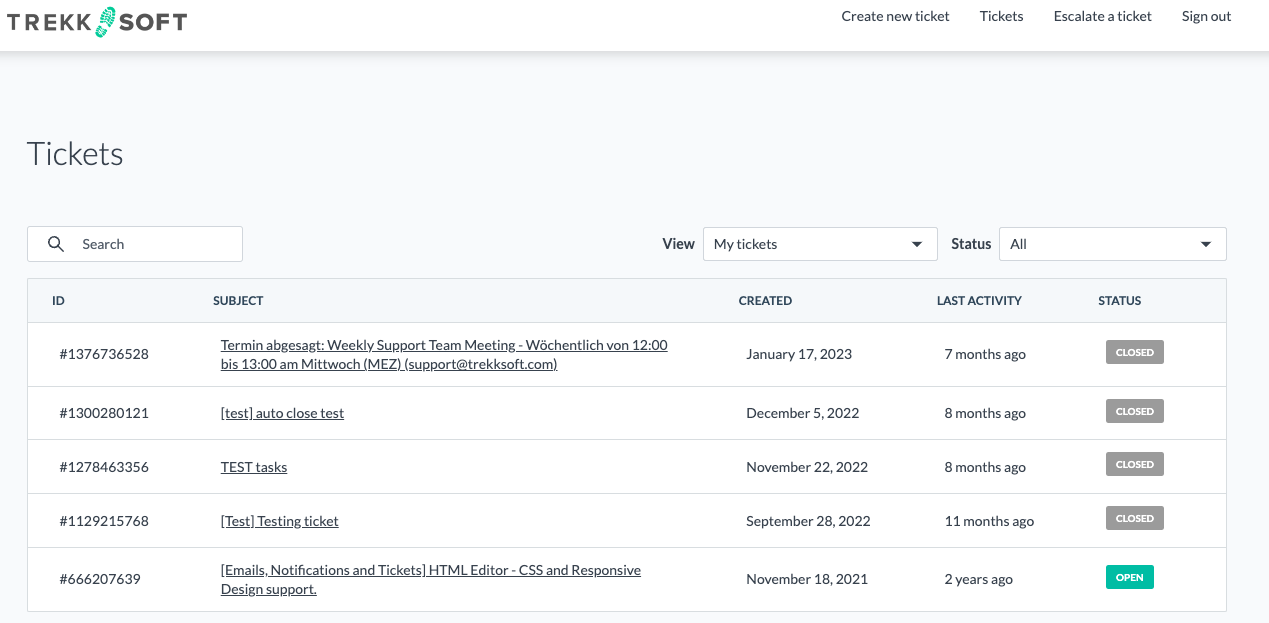
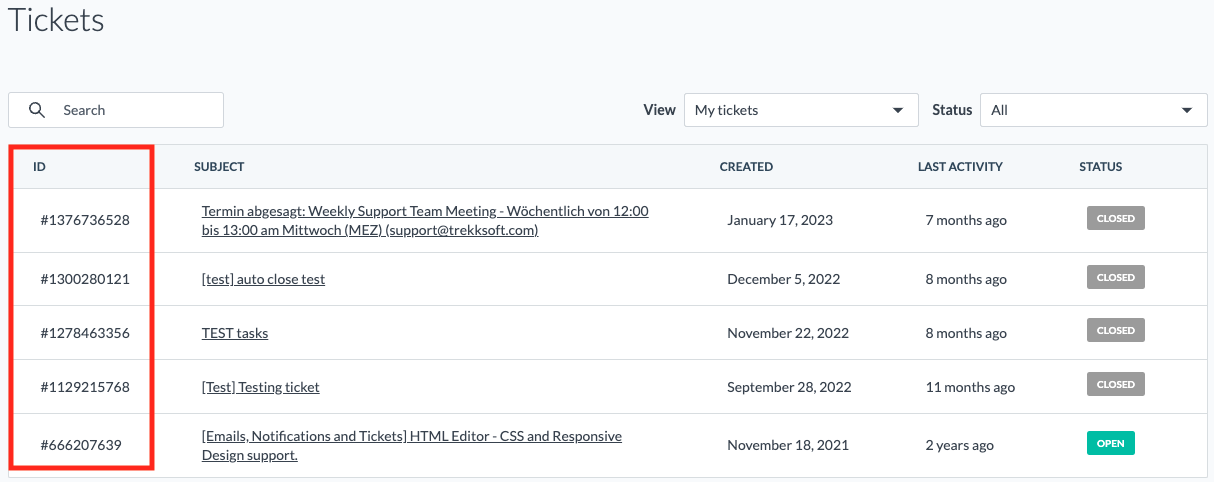
On the ticket portal homepage, you will have a complete overview of all the tickets that you or your colleagues have reported with a view of useful information (such as the current status of the ticket, the date it was opened, last activity etc) . This comprehensive view allows you to easily track and manage your support tickets.
Creating a new ticket
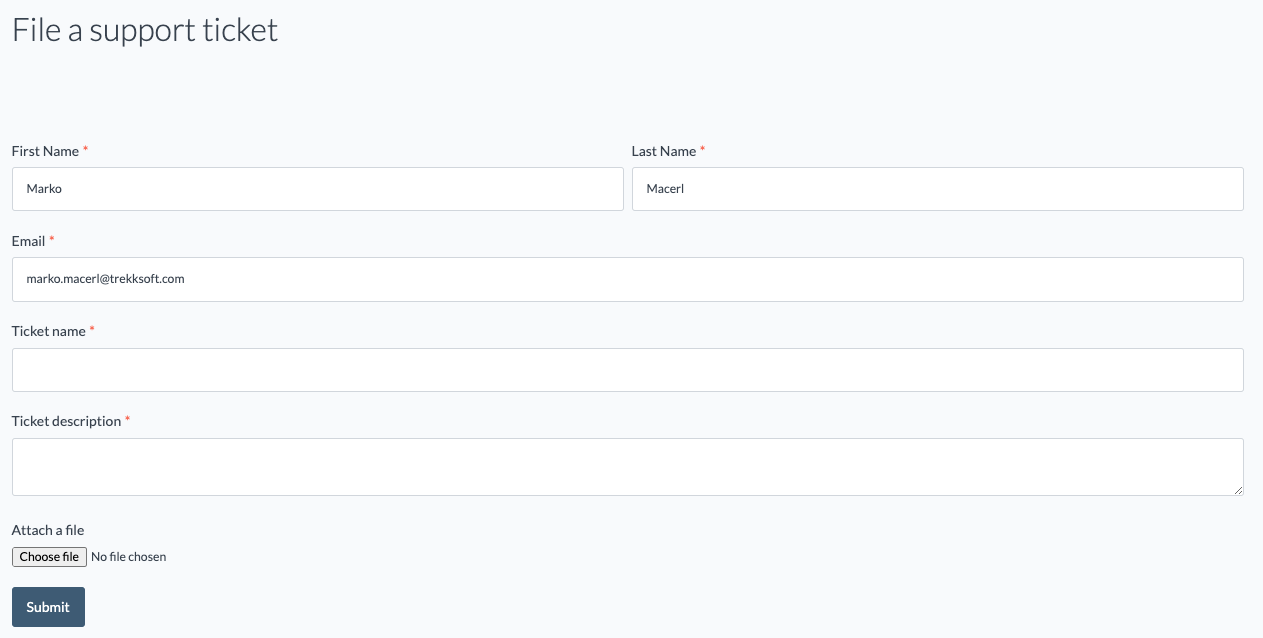
You can use the portal not only to follow up on existing tickets but also for creating new ones. You can do so simply by clicking on the "Create new ticket" button that can be found in the navigation menu or in the bottom of the page.
When creating a new ticket, a form will open where you need to provide the necessary details for the new ticket. The required fields are marked with a star, indicating that they must be filled out.
Responding a ticket
To review a specific ticket and take action, simply click on it to open a detailed view of the ticket.
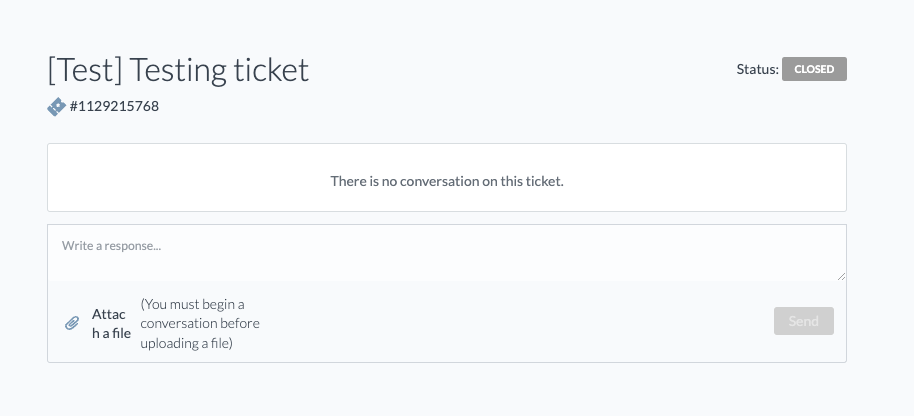
You can easily follow up on the ticket by writing a response directly in the portal and sending it. This allows you to communicate with our support team and provide any additional information or updates regarding the ticket.
When should I escalate a ticket and how can I do it?
If you feel that you are not receiving the appropriate assistance for one of your existing tickets, you can escalate it. Escalating a ticket is a way to draw attention to the issue and ensure that it receives the necessary attention and resolution.
When a ticket is escalated, it triggers an internal process within our support system. The ticket is flagged and immediately notifies the escalation manager, who is responsible for overseeing the escalation process. The escalation manager will then carefully review the reason for escalation and take the appropriate actions to address the issue.
You can escalate a ticket simply by clicking on the "Escalate a ticket" button that in the menu navigation bar.

A new form will appear, prompting you to provide additional details:
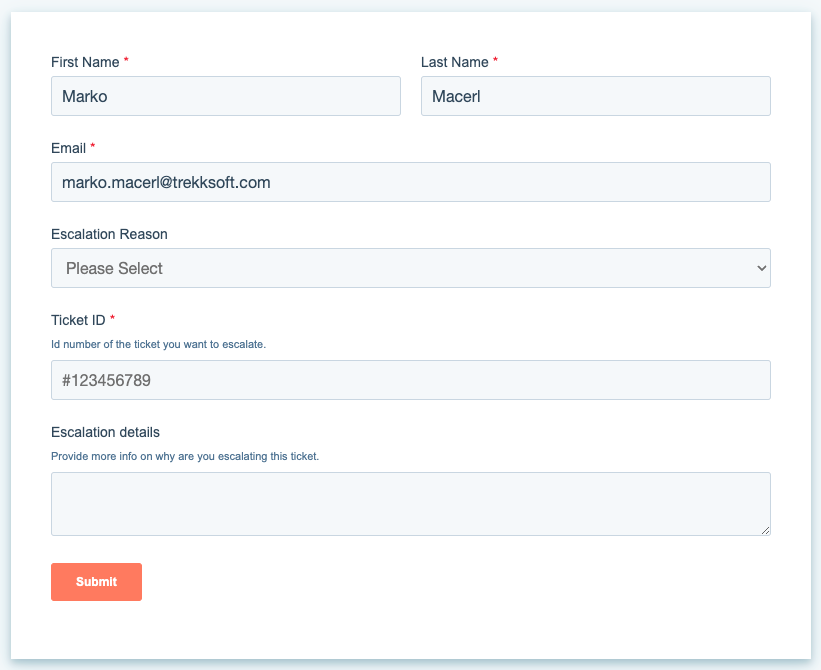
Escalation Reason
You need to choose an option from the drop-down menu that best describes why you are escalating a specific ticket.
Reasons available to choose from are:
- Response time
- Select this option if you have not received a timely response from our support team.
- Wrong solution provided
- Select this option if the solution that was provided is not the right one.
- No solution provided
- Select this option if there was no solution provided.
- Inappropriate handling
- Select this option if the case was not handled appropriately in any manner.
- Screen sharing request
- Select this option if you think that a screen sharing session would help us resolve your issue more quickly.
- Other
- Select this option if any of the above don't fit. In this case please explain more in the details.
Ticket ID
This is the most important field as this will provide a reference to the ticket that you are escalating. You can find the ticket ID in the general ticket view under the column "ID"
Escalation details
Here you can provide further details as to why you are escalating a ticket, it is important to be specific and provide as much relevant information as possible. This will help the escalation manager understand the issue and take appropriate actions to address it.