- ________________________________________________________________________

ExperienceBank allows you to connect your availabilities to TripAdvisor Experiences, allowing last-minute sales through their marketplace while you manage your availabilities and bookings through TrekkSoft.
If you wish to know more information about ExperienceBank please go to our Article here
What Would You Like To Do?
In this guide, we will cover the following topics:
- Set up a Viator account
- Connect To Viator (Tripadvisor) For The First Time
- Map Your Activities
- Useful Information About The Connection
Don't forget to check out our FAQ's at the bottom of the article!
Set Up Your Viator Account
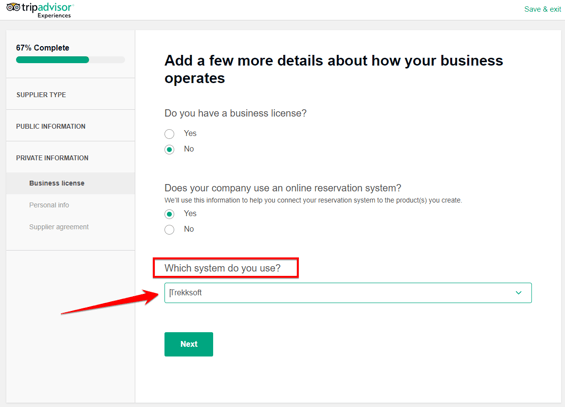
To connect with Viator, you first need a Viator contract and supplier account created. To apply to Viator, you can do so via this page: https://supplier.viator.com/sign-up-info?m=62400
Note: Make sure to select TrekkSoft as your reservation system!
Once you have completed your setup with Viator and have a Supplier ID, you are then ready to setup the link between Trekksoft and Viator!
How To Connect To Viator For The First Time
If this is the first time you are connecting to Viator, you can follow the step-by-step instructions:
- Log into your Admin Desk. On the left-hand menu, click on Channel Manager > Marketplaces.
- In the Marketplaces dashboard, Find Viator and click the Apply button. A popup window will then be displayed.
- In the popup window, You must review and accept the terms and conditions. Once reviewed, scroll to the bottom of the window and click the Accept Terms of Service and Send Application button.
(Note: Accepting our terms of service notifies TrekkSoft that you want to activate your connection with Viator and does not impact your application to the OTA). - You'll be directed back to the Marketplaces Dashboard. Scroll the page to locate Viator and click on the Manage button.
- Now, you will see a notification advising you are connected to Viator! Click the ExperienceBank button and you will be redirected to the ExperienceBank system.
(If you are not logged in automatically, login with the same credentials you use to login to Trekksoft). - Once logged in, you will be in the Marketplaces section. Search for Viator and click on the Enable or Go To Mapping button.
- You will be asked to enter your Supplier ID. Enter your Supplier ID in the field provided and click save.
- The next step will ask you to choose from two options:
- Request Viator Integration - Click this button sends an email to Viator's team who will reply to you with a .csv file that you can upload to ExperienceBank.
- Import - If you already have a .csv file, you can click the import button, browse for the .csv file and click open.
- Once the file is imported, you are now ready to begin mapping your activities!
Note: It can take a couple of hours for the connection between ExperienceBank and Viator to complete.
Note: Please make sure that you already have your products created on Viators backend for smooth connection. If not products are listed when the connection is requested, then you won't be able to upload a CSV on your account thus delaying the connection.
How To Map Your Activities 🤔
Note: If you have already set up your Viator connection and you are just updating your mapping, request a CSV file from the SAPI team at Viator (supplierapi@tripadvisor.com)
To map your activities with Viator, you can follow the step-by-step instructions.
If not done so already, log into ExperienceBank (See the first time login above if you are not sure how to do this)- On the Viator option, click the Go To Mapping button
You should have already imported your .csv file at this point, however, if you haven't, you can import the file in the top-right hand corner using the Import OTA option.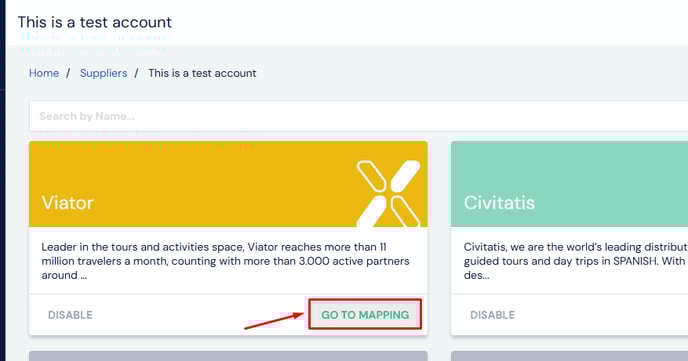
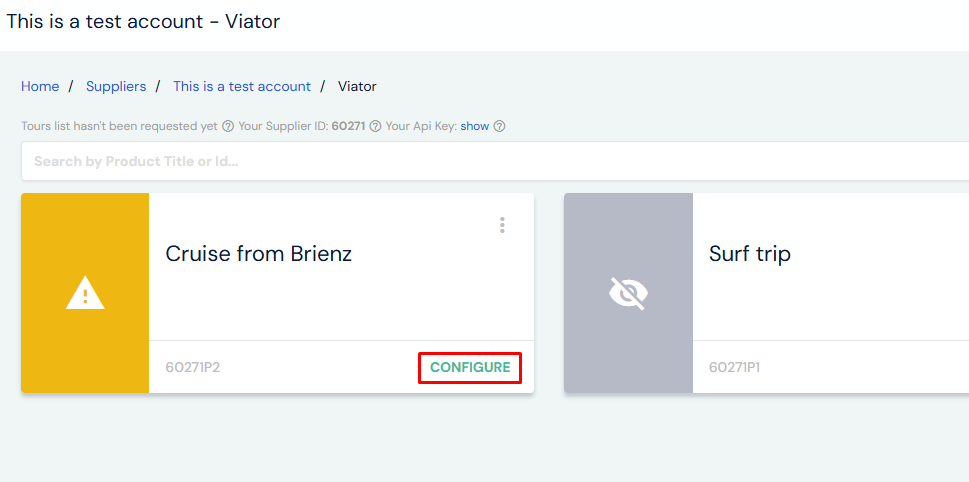
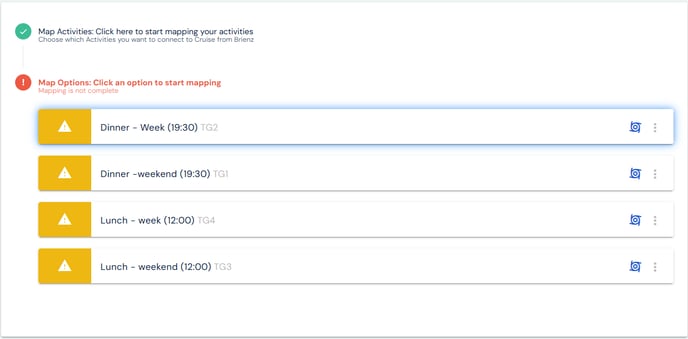
- Choose the activity you wish to map by clicking the configure button on the activity
- Inside the page you can select the activity that you wish to map with the product that you have chosen
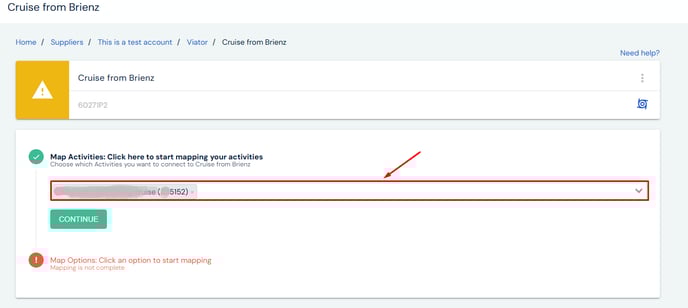
- Once you have selected the activity, the Product schedule should now then appear depending on the CSV file that you have uploaded. Please do note that these options comes from the Schedule that you have from your Viator product.
- Once you have selected all schedules you wish to map, click the done button
- Now you can add/remove the price categories you wish to use. If you wish to remove a price category, on thr right hand side of the price cateogry, click the ellipsis (3 dots) button and click delete.
- Finally, once all price categories are correct, click the save button in the top right-hand corner
Your mapping is now complete! 😀
Tip! If you hover over any activity or schedule in orange or green, a message will appear advising the current status of that particular option
Useful Information About The Connection
Mapping
- Whenever you add a new price category to an active schedule, you must map it on ExperienceBank for the updates to be aligned correctly with Viator.
- Viator is very strict with Time Options. Make sure that the schedule time in Viator and with your Trekksoft activity matches.
- Viator has its own price categories (Adult, Child, infant...) which you must correspond with your own price categories in Trekksoft. Any Price Categories you no longer use, make sure to disable these when you are mapping in ExperienceBank.
- If a price category exists on Viator, please map the price categories otherwise they may cause issues.
- When mapping activities, bear in mind the cut-off time as it’s respected.
- If your product does not have availability within the next few months, you will be able to see and map it on ExperienceBank but you will not be able to see it on Viator.
![]()
Here are some commonly asked questions to help you manage your connection with Viator:
- What Can I Map With Viator?
- What Guest Information Is Collected?
- What happens when I cancel a booking connected with Viator?
- What Reporting Is Available?
- How To Connect Products on Viator
- How QR codes works for Variable Pricing?
What Can I Map with Viator?
Review the table below to see what features you can/cannot map with Viator:
| Feature | Can this be mapped |
| Activities with Multiple Schedules | Yes |
| Seasonal Activities | Yes |
| Variable Pricing | Yes |
| Voucher Schedules | No |
| Cut-Off Time | Yes |
| Multi-Day Schedules | Yes |
| Yield Management | No |
| Rentals | No |
| Packages | No |
| Bookings Completed After The Start Time | No |
| Confirm and Charge later? | No |
| Exclusive/private price category | No |
| Multiple TrekkSoft accounts to 1 Viator account | No |
| Multiple Viator accounts to 1 TrekkSoft account | No |
What guest information is collected?
Viator provides you with the mobile phone number of the guest (referred to as a user), but not the email address.
Additional guest information will be saved as a basket remark (e.g. meeting points or food allergies). We cannot map guest custom fields from Viator.
What happens when I cancel a booking connected with Viator?
If you cancel a booking on TrekkSoft, this cancellation will not go through to Viator. You will need to notify them directly
If you cancel a booking on Viator, a cancellation request will be sent to Trekksoft via ExperienceBank.
What Reporting Is Available?
TrekkSoft does not provide reports on commission or guests booked through the channel, you will need to rely on Viator for these numbers.
How QR code works for Variable Pricing?
A single QR code will be sent to the buyer for the entire group and the QR code can be scanned using TrekkSoft mobile app (mPOS).